If you’re renting, borrowing, or testing a BMW R 1250 GSA, it’s useful to know how to operate the main controls.
The below is a distilled version of what’s in the user’s manual for the R 1250 GS / GSA. You can get the manual here if you want to see the source. I put this together for myself as a quick start guide before renting a BMW R 1250 GS on vacation.
There’s a lot going on with these advanced motorcycles, so I’ll try to distil it to the bare minimum without having to dive (too much) into menus.
Are you obsessed with motorcycles?
Well, I am. That’s why I created this site — as an outlet. I love learning and sharing what others might find useful. If you like what you read here, and you’re a fraction as obsessed as I am, you might like to know when I’ve published more. (Check the latest for an idea of what you’ll see.)
Using the “Wonder Wheel”
BMW has been making motorcycles with the “Wonder Wheel”, or “Multifunction controller” since the early K 1600 models, but in the late 2010s it started to bring it to the R line with TFT displays.
The “wonder wheel is” the clicky spinny thing that’s on the left handlebar. It has great tactile feedback. You can use it with one hand without looking at it, though you still have to look at the display to see what it’s changing.
The wheel moves not just in a rotating direction, but can be clicked left and right.
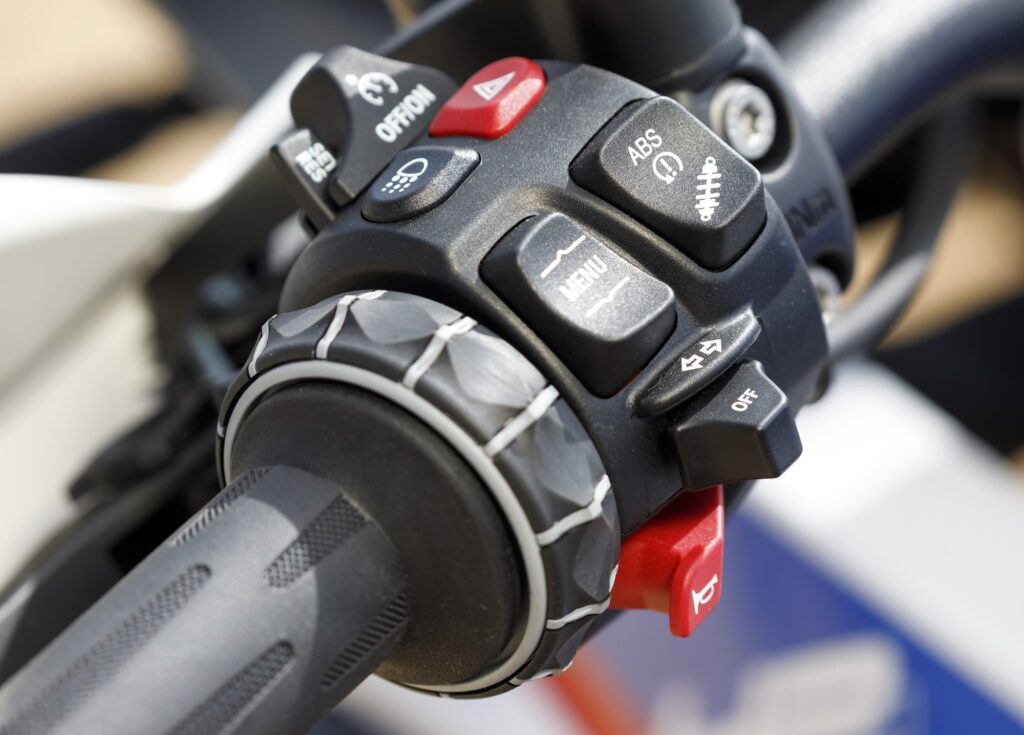
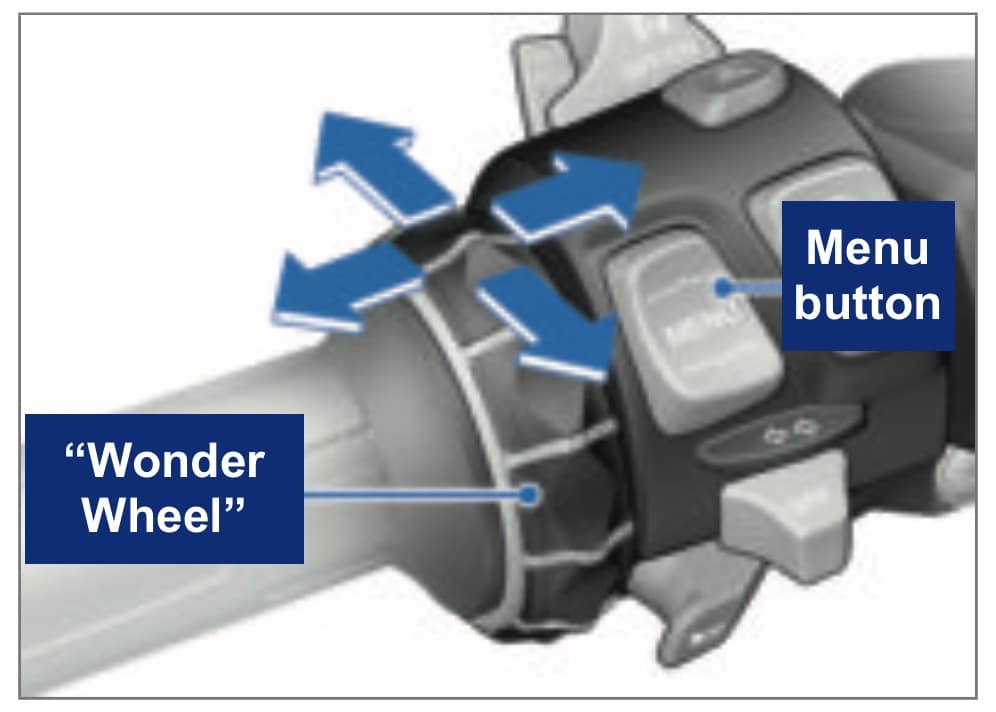
If you’re new to the BMW Wonder Wheel, then the one bit of advice is to play with it somewhere where you have time and space. Don’t attempt to figure it out while riding out of the dealer lot!
First, the menu button. Pressing the top of the menu button cycles you through various display options for the “status line”.
You can also long-press the menu button to change to “Pure Ride” view.
To access the menus, you press the bottom of the menu button. Then you can use the wonder wheel to cycle through menus and change and choose various options.
There are a few settings you might want to adjust very quickly.
- The default four ride modes. The Riding modes button lets you cycle through four. If you have “Riding Modes Pro”, then there are seven possible riding modes. Make sure you have enabled the four you want to use. (E.g. if it’s not going to rain for the foreseeable future, then you don’t need “Rain” mode.)
- Ride Pressure Warning: Turn the “RDC” setting off. (RDC is German for Reifendruck Control, though in German “Control” is normally written with a “K”.) This is useful if you want to alter pressures for your riding and don’t want the warnings.
- Connections: Hook up your mobile phone!
If you get sick of the menus, long press the top of the menu button to get out of there.
Riding modes
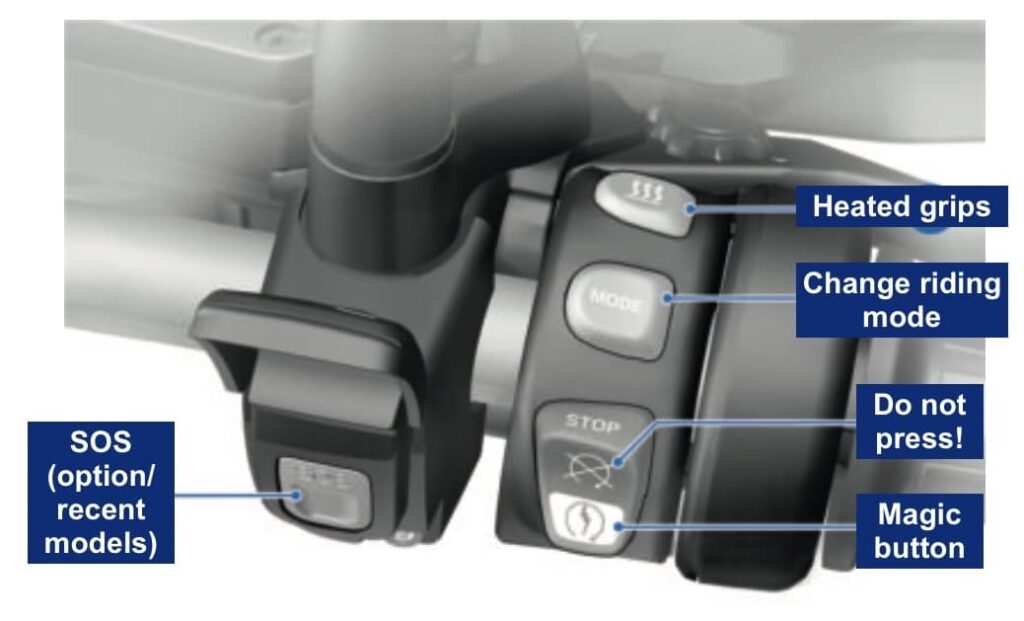
The base model has three riding modes — Eco, Rain, and Road. The “Pro Riding Modes” add on (a common one) enables four more, for a total of seven: Enduro, Dynamic, Enduro Pro, and Dynamic Pro. To change riding mode on the R 1250 GS, press the button on the right control block. It says “mode” on it.
You can change riding mode when the throttle is closed, cruise control is off, and you’re not braking. So you’ll be slowing down.
Here’s how the riding modes are defined.
| Riding mode | Throttle response | ABS | Rear wheel lift off | DTC |
|---|---|---|---|---|
| Eco | Particularly restrained | Road use settings Max ABS Pro | Maximum | Later than Rain — Avoids rear wheel spinning Front wheel lift-off prevented |
| Rain | Restrained | Road use settings Max ABS Pro | Maximum | Early intervention Front wheel lift-off prevented |
| Road | Optimum | Road use settings Max ABS Pro | Maximum | Later than Rain — Avoids rear wheel spinning Front wheel lift-off prevented |
| Enduro | Restrained | Enduro ABS adjusted for off-road use, road tires Reduced ABS Pro | Maximum | Very late intervension. Long drifts, brief wheelies allowed |
| Dynamic | Direct | Dynamic road use settings Reduced ABS Pro | Gentle lift off allowed | Late DTC intervention. Minor drifts / wheelies allowed |
| Enduro Pro (Customisable) | Optimum | Enduro Pro ABS adjusted for off-road tires No rear brake with foot lever Not available | Disabled | Assumes cleated tires, allows long drifts. No wheelie prevention. |
| Dynamic pro (Customisable) | Direct | Dynamic road use settings Reduced ABS Pro | Gentle lift off allowed | Late intervention. (Wheelie prevention not mentioned in manual) |
Traction Control
If you’re really desperate to wheelie your bike, you can also disable traction control on the R 1250 GS. Press the traction control button on the left handlebar (top of the same button as suspension settings), and then hold it down to disable TC. The warning light will display.
To enable TC again, hold the button down again. The TC warning light will switch off, provided that the motorcycle is moving.
Cruise control
The cruise control switch is on the left handlebar. This is the same style of control for all modern BMW motorcycles with cruise control.
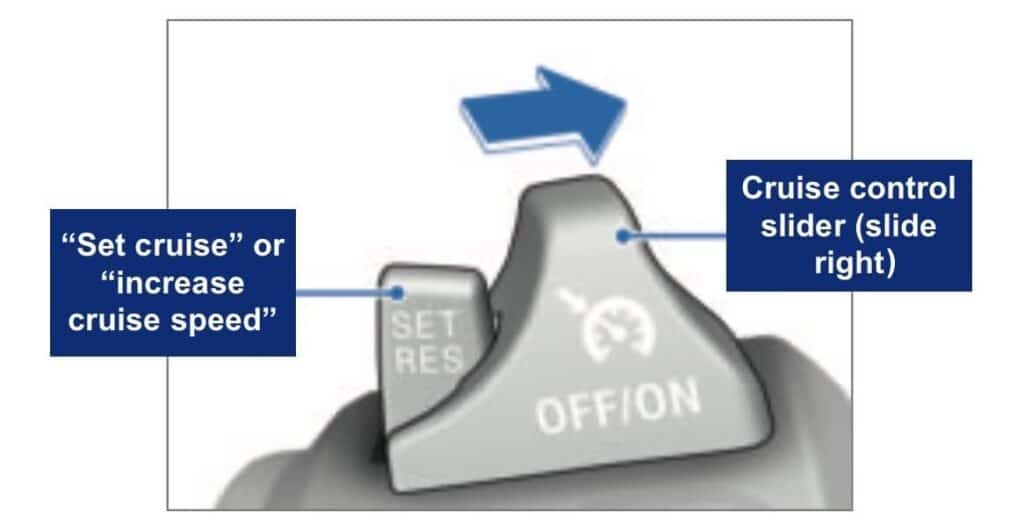
Slide the slider to the right, then push the button forward to enable cruise control. You can tap it forwards and backwards to nudge up or down the speed.
Suspension settings
Adjusting the suspension on the R 1250 GS / GSA depends on whether you do or don’t have electronic suspension (Dynamic ESA “Next Generation”).
The easy case is where you have Dynamic ESA “Next Generation”, a commonly selected option, especially on rental or test ride motorcycles.
Dynamic ESA “Next Gen” does a few things:
- Automatic preload adjustment: The BMW R 1250 GS’s active suspension automatically adjusts preload according to the load on the motorcycle, using ride height detectors. So you don’t have to adjust preload depending on your weight, or that of the passenger and/or your luggage. (Note: For this to work, the load setting should be set to “Auto”.)
- Active suspension: The damping level changes in response to the road conditions, providing a level of damping suitable to the terrain.
- Damping modes: Similar to previous electronically adjustable suspension, you can set the damping mode to “Road”, “Dynamic”, or “Enduro”.
To view or adjust the current preload damping setting of the R 1250 GS, press the suspension button.
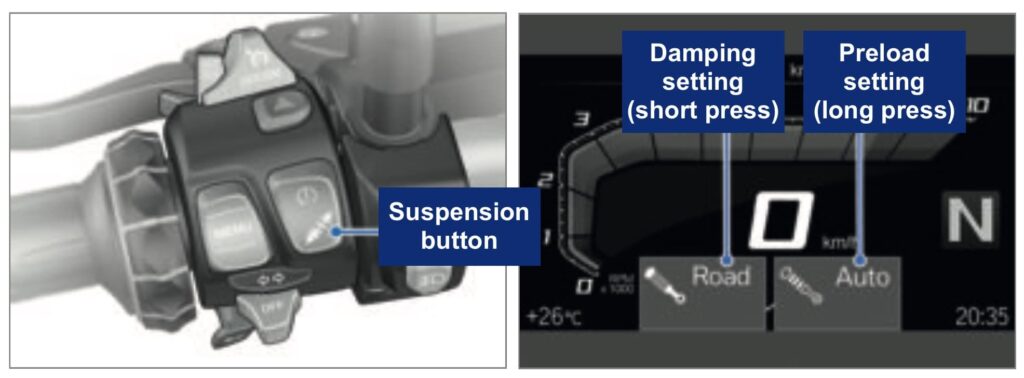
Press it once to view the settings, and then:
- Short press to cycle through the damping settings: Road, Dynamic, or Enduro.
- Long press to cycle through preload settings. (For simplicity’s sake on test rides or rentals, it may be easiest to set this to “auto”, unless you have a particular reason to override.)
If you don’t have Dynamic ESA, you can set preload and damping for the rear wheel.
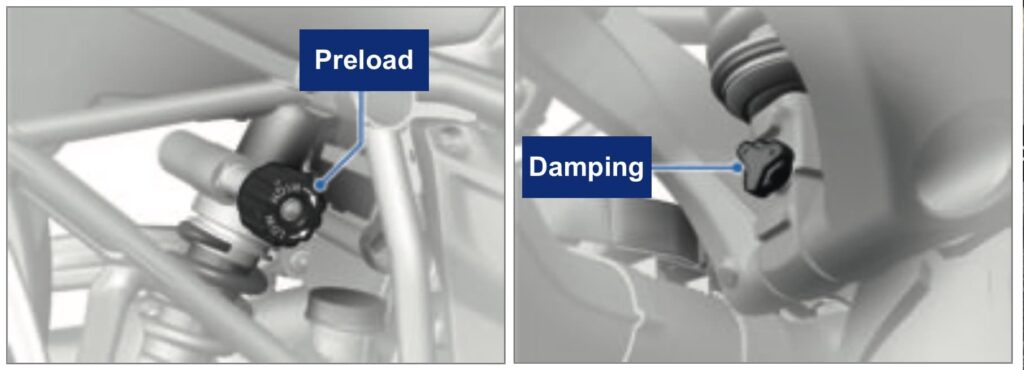
Turn the preload knob towards high to increase preload, for when there’s more load on the bike.
Turn the damping knob clockwise to increase damping, for smoother / less rough surfaces.
| Setting | Basic setting | One-up, no luggage | One-up, luggage | Two-up, luggage |
|---|---|---|---|---|
| Rear preload | Turn knob at (at top of shock) in LOW (reducing preload) direction as far as possible, then in HIGH direction: | Nothing (leave at zero) | 15 turns | 30 turns |
| Rear damping | Turn adjuster (at bottom of shock) as far as possible in clockwise direction (increasing damping), then back it off counter-clockwise: | 8 clicks | Base model: 2 clicks Adventure: 4 clicks | Base model: 2 clicks Adventure: 4 clicks |

