This is a list of everyday useful motorcycle photography tips for amateurs that anyone can use — even if you’re using your phone, or at best your portable camera.
You don’t need a $500+ camera or a full studio to take great photos of your motorcycle. Chances are, if you do have one, then you’ll be loosely aware of some of the tips in this article.
This is rather a guide to motorcycle photography for the ordinary person who wants to sell their motorcycle or upload a photo to Reddit or their favourite motorcycle forum and you want it to look great. Here’s what to do!
These aren’t professional motorcycle photography tips. I’m not a professional, just an amateur who has been around for a while. I don’t have a studio. I just like to use my limited resources to get the best photos possible without selling myself short for no reason.
A word on examples you’ll see in this article: The photos are not individually perfect in every way. I chose them because they illustrate ONE point, not all the points. For example, a photo might illustrate good lighting, but its composure might be lame.
Are you obsessed with motorcycles?
Well, I am. That’s why I created this site — as an outlet. I love learning and sharing what others might find useful. If you like what you read here, and you’re a fraction as obsessed as I am, you might like to know when I’ve published more. (Check the latest for an idea of what you’ll see.)
Better Motorcycle Photography In a Nutshell
Here’s the guide to taking better motorcycle photos in summary. Where I can, I’ll put some examples of people taking good photos of motorcycles or bad ones.
In a nutshell, what I’m trying to say here is when taking photos of your motorcycle, think about:
- Is the lighting as flattering as possible? Diffused, with highlights? Not harsh/with shadows
- Is the whole motorcycle visible in the photo, or am I showing a zoomed-in detail? (Either is good — but not something halfway)
- Is the photo composed well? Bike in the middle, in a nice place, photo level, nothing distracting around it?
- Is the background free of distractions? No lines, harsh objects?
If you think about those questions, you’re more likely to improve your motorcycle photography.
Many of the motorcycle photography tips here are specialised versions of photography tips in general. If you take portrait photos you’d be aware of all of the above. Some of the other tips will be motorcycle-specific (or vehicle-specific), though, like a suggestion to leave lights on (a bit like leaving your eyes open)
I’ve been taking photos of motorcycles for a long time. And photos for even longer, since the mid 1990s when I (along with everyone else) was still using film.
Along the way, I got semi-obsessed with the technique of taking photos. And motorcycle photography is a happy marriage of my two passions!
A lot of the guides out there on motorcycle photography are about taking race photos, or studio photography by professionals, or photos of a person like Keanu Reeves next to his masterpiece. That’s cool — we all love BikeEXIF and Keanu Reeves — but it’s not what I’m interested in. I’m interested in helping people use minimal effort to show off their motorcycle with everyday tools.
Basically, all the below is “the basics”. I see a lot of photos not meeting these basics, though.
Onward to the tips.
Use bright but diffused, even lighting
First motorcycle photography tip is about lighting — make sure that the light falls on your motorcycle evenly.
In other words, make sure that the light is not harsh, e.g. from direct sunlight, creating shadows and harsh contrast.
Shadows and high contrast aren’t bad all the time. You can use those dramatic effects if you’re an artistic photographer like if you’re showing a motorcycle is capable of crossing the desert, or something. But in everyday photography where you’re trying to showcase a bike for display or to sell it, harsh light is not good.
Here’s an example of even lighting on a motorcycle, on a Suzuki GSX1300R Hayabusa, using no equipment:
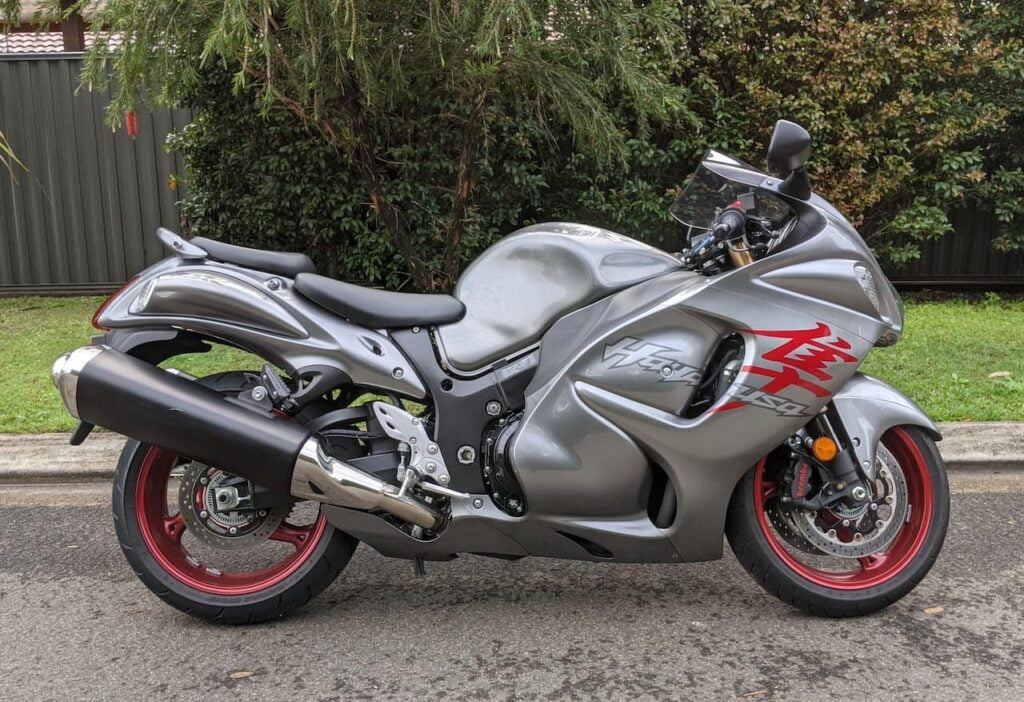
You can tell the light is even because there are no bright white bits (overexposure), or bright light/shadows falling across it.
For that photo of a Hayabusa I just used my phone. The day was overcast. I shot it while doing a test ride, but if I had more time/resources, I’d have used some exterior lights to light up some of the shadows below it.
There are three simple ways to get diffused, even lighting on your motorcycle: clouds, cover (from a building, shed, garage or trees), and shooting at dusk and dawn.
- Clouds: When the sun is behind a cloud, the light becomes diffused. This is the simplest way of getting diffused, even lighting. Cloud-diffused sunlight bathes your bike in an even glow. Doesn’t have to be a cloudy day — just the sun behind a cloud is fine.
- Shade or cover: Another way of getting diffuse lighting is to shoot your motorcycle in the shade tree or garage cover. Shooting in the shade of a building is one way of doing this. If there are lots of trees or scrubs around, they’ll diffuse the lighting on your bike — but be aware of bright light coming between the leaves.
- Dusk or dawn: Finally, shooting a motorcycle (or anyone/anything!) at dusk or dawn gives you great light. Photographers call it “magic hour”. (Sunset is better for most riders — I prefer dawn for actual riding when everything is beautiful and there’s no traffic.)
For example, I took the following photo of my naked Ducati Multistrada (see my build guide and discussion of my regrets here) at sunset, south of San Francisco.
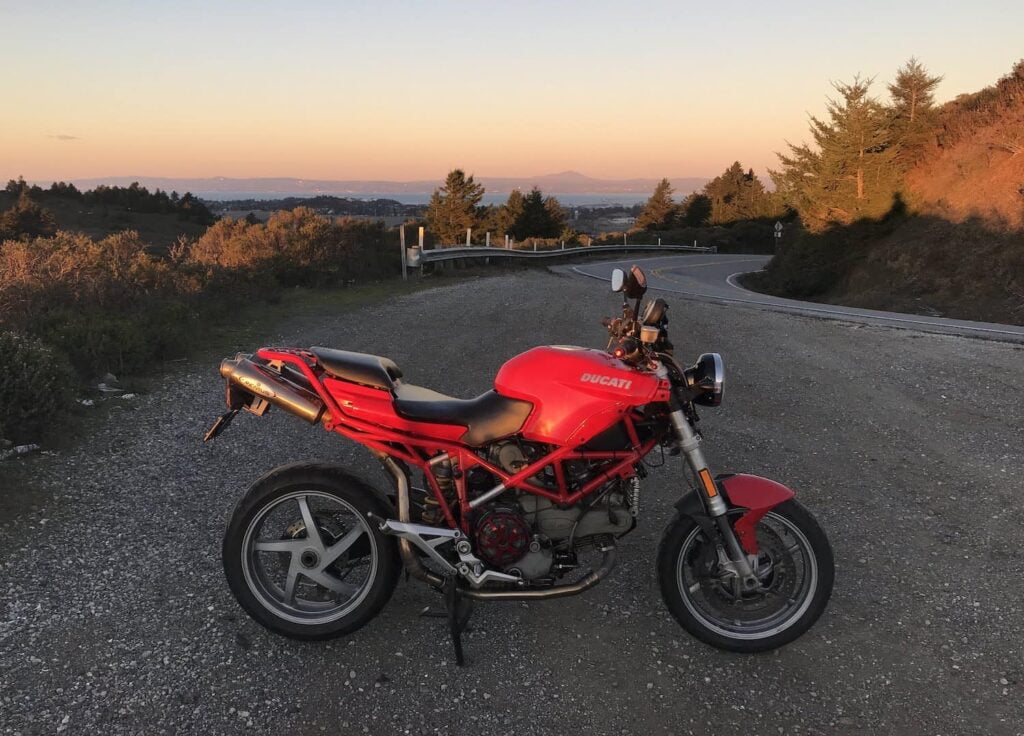
The sun had already set and so there was no bright light falling on my Ducati. I needed to take photos to sell it, and decided that was the place and time.
(Another note — this photo also satisfies a few other requirements, like not having anything distracting behind it, and being framed correctly.)
And here’s an example of bad lighting on a Yamaha MT-09 I rented for a day:
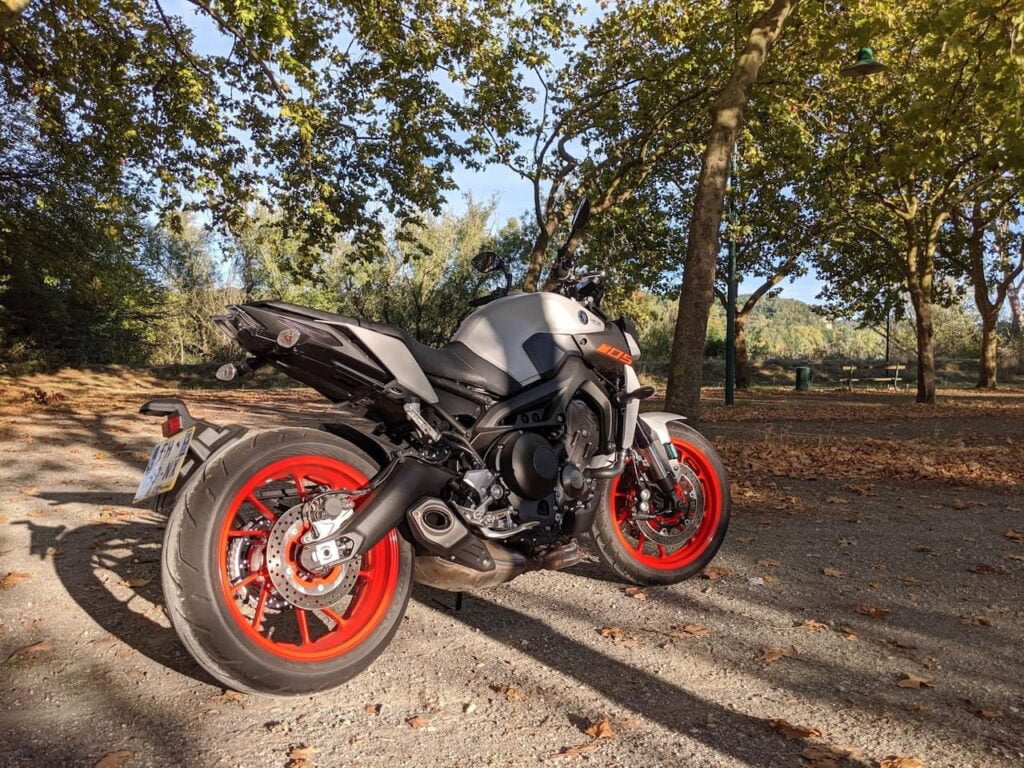
I took this photo not thinking too hard about it. But wow, look at those shadows! Especially the one of a tree cutting the whole motorbike in half! Insane.
There are other things wrong with the photo too, like the composition. It has a busy background and the motorcycle is faced away in a way that means I can’t quite see where the handlebar is.
Use exterior lights to lighten up dark bits
You can get super advanced quite easily in motorcycle photography by using some clever lighting on your motorcycle.
In studio motorcycle photography, people use lights (and even coloured lights) around a bike to light up every bit of it. You don’t need to go as far as using professional lighting.
But if you have some garage lights, or even some desk lamps, or even just a flashlight, you can create your own mini-studio to lighten up the critical dark bits.
In this photo, I shot it in daylight (but under a garage port cover), and used indoor lighting plus my phone’s lighting to lighten it up as much as possible. You can see a few reflections in the silver body work — that’s from other lights. (I should have lit up the rear wheel more, but I ran out of lights.)
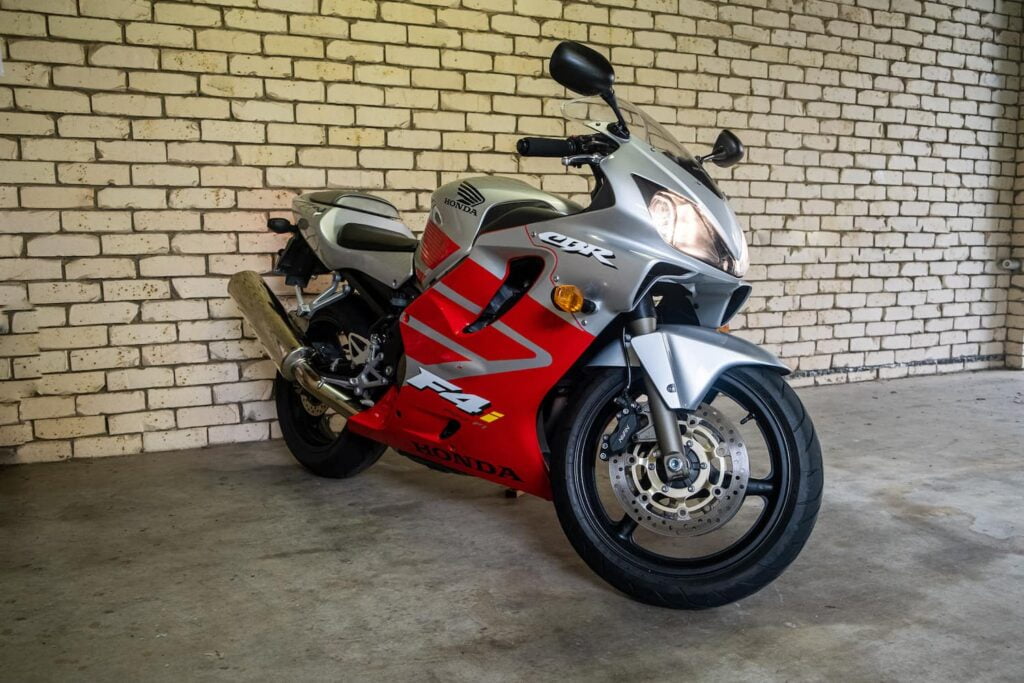
Also worth mentioning (as I talk about having a clean background later): the background isn’t totally clean, but it’s repeating, contrasting, and non-distracting. (I didn’t have much space, or I’d have moved it further away to make the wall out of focus.)
Also, I turned the motorcycle’s headlights on, something I should mention!
Turn the motorcycle’s headlights on
A simple motorcycle photography tip to make your photo look more “alive” is to have the headlights on. If there are twin headlights, then turn the high-beam headlight on too.
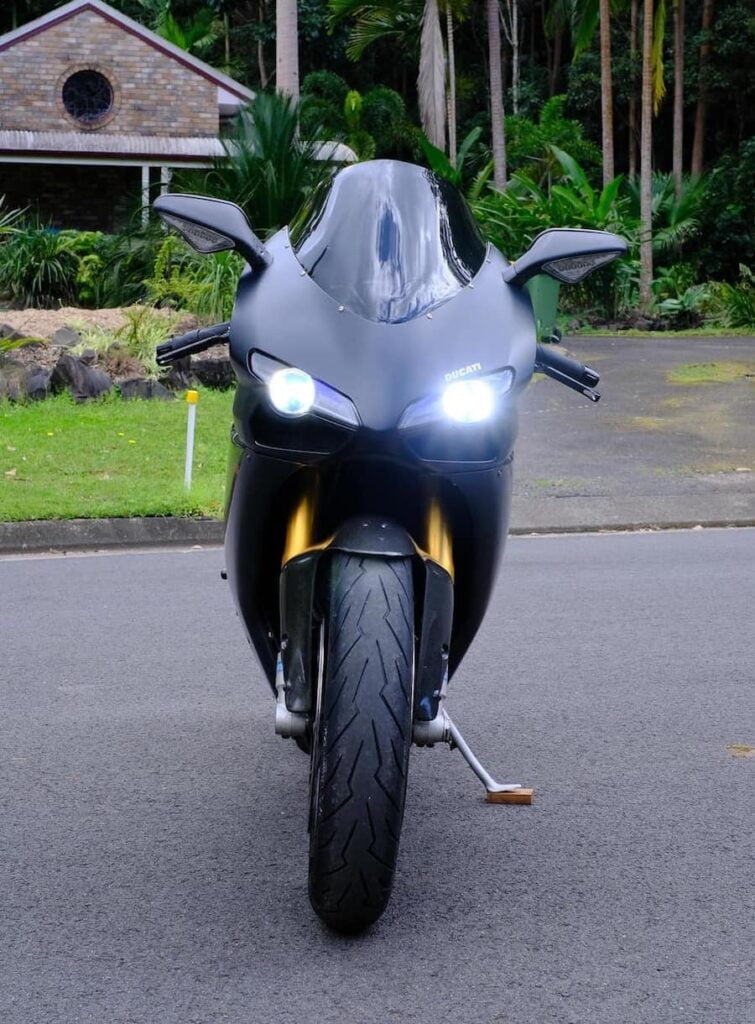
Having both lights on makes your bike look alive and functional. Note that one will always look brighter because it’s a high beam and so points more directly upward.
It isn’t the end of the world if you forget to turn the lights on. But lights that are on is an improvement in many cases.
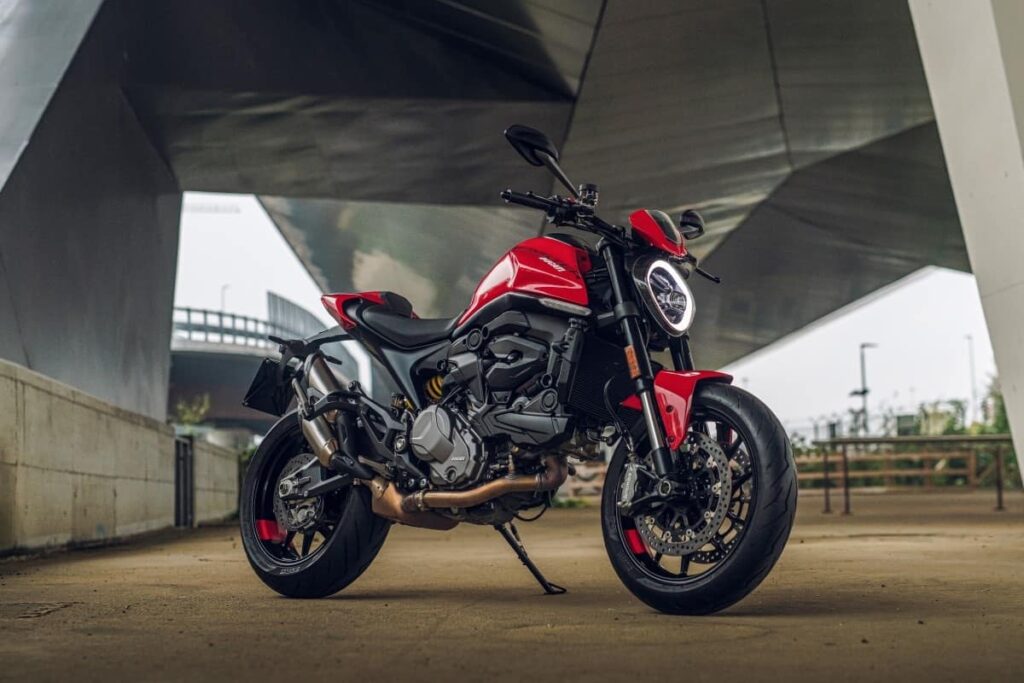
Keep the immediate background of the motorcycle clutter-free or out-of-focus
This is a very common and serious motorcycle photography error and one that’s very easy to fix. Think about what’s behind your motorcycle.
It’s tempting to just park up your motorcycle somewhere and take a photo of it when you have nothing in front of you (between you and the motorcycle).
But you have to also make sure that there’s nothing immediately behind the motorcycle.
For example, this is bad:
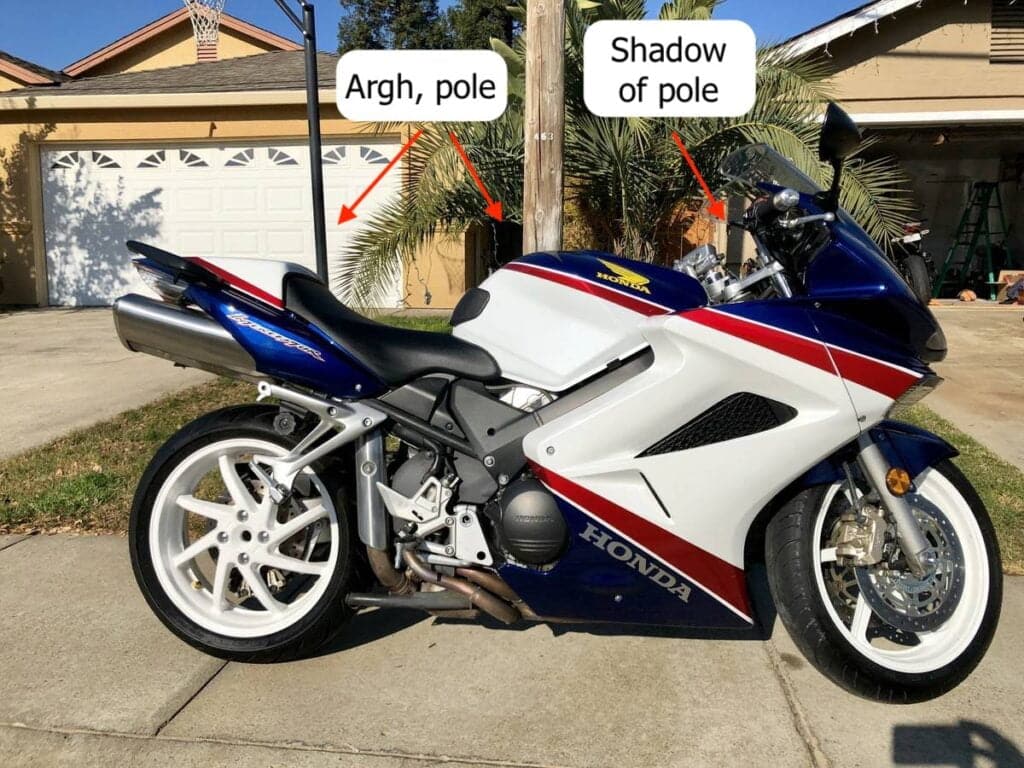
In the motorcycle photo above (a VFR800 I checked out years ago), there are poles bifurcating the motorcycle at various points. And a busy plant. It’s really quite annoying because the motorcycle is a beautiful stock VFR800F in Honda’s beautiful tri-colour scheme, but the photo sells it short.
How do you fix this? Just wheel the motorcycle out somewhere where the background is clean and even.
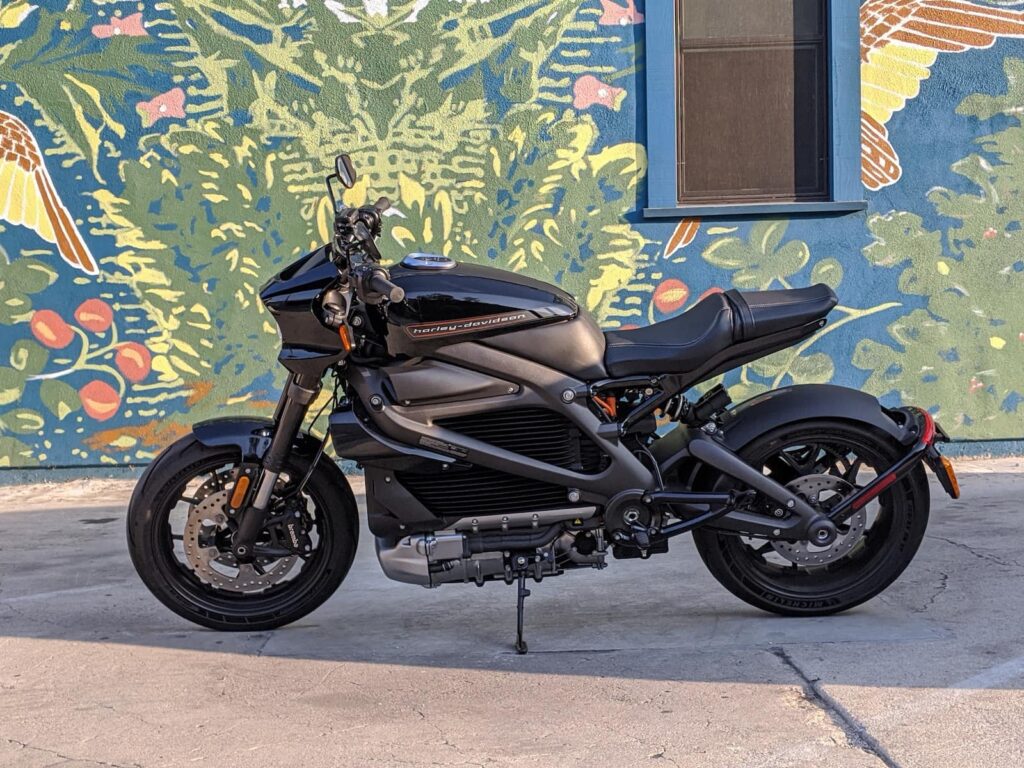
I took this photo of a Harley-Davidson LiveWire (here’s my review) against a solid grey wall and in an empty parking lot. No random objects or other vehicles to distract. It’s not perfect colour-wise — the blacks and greys leave the whole thing looking a bit drab — but it is not distracting.
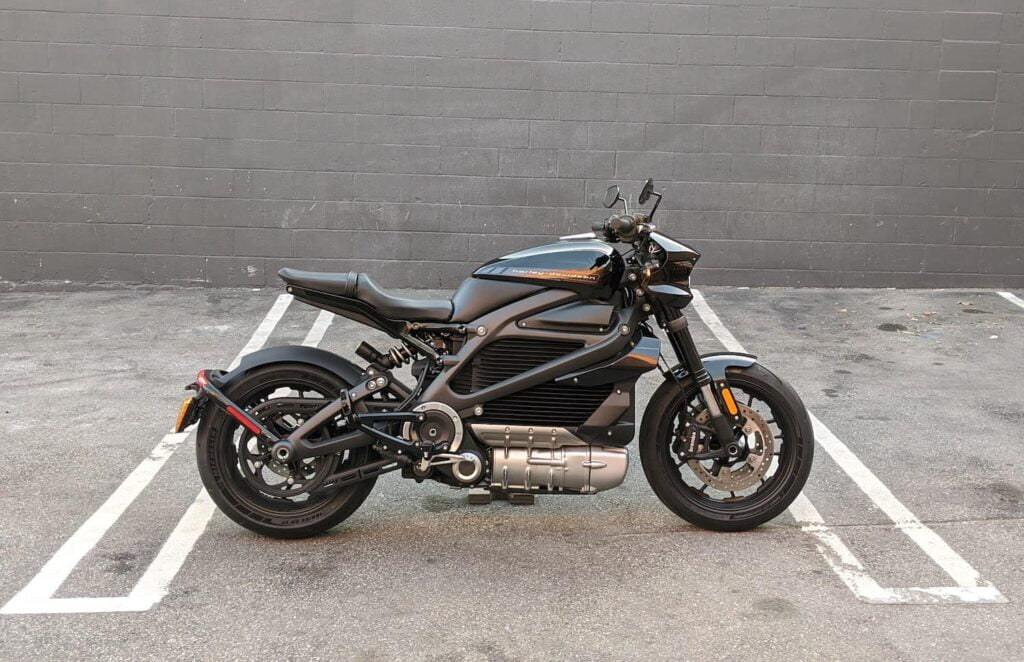
If you want to see a better photo of the LiveWire with complementary colours, I have one below in the section where I talk about the importance of complementary colours!
You don’t have to have a perfectly clean wall. There can be a recurring pattern, or an out-of-focus background, as long as it doesn’t interfere with what’s in the foreground.
Here’s a photo with what would have been a noisy background, but which I blurred out by using a camera with a big lens and a shallow depth-of-field.
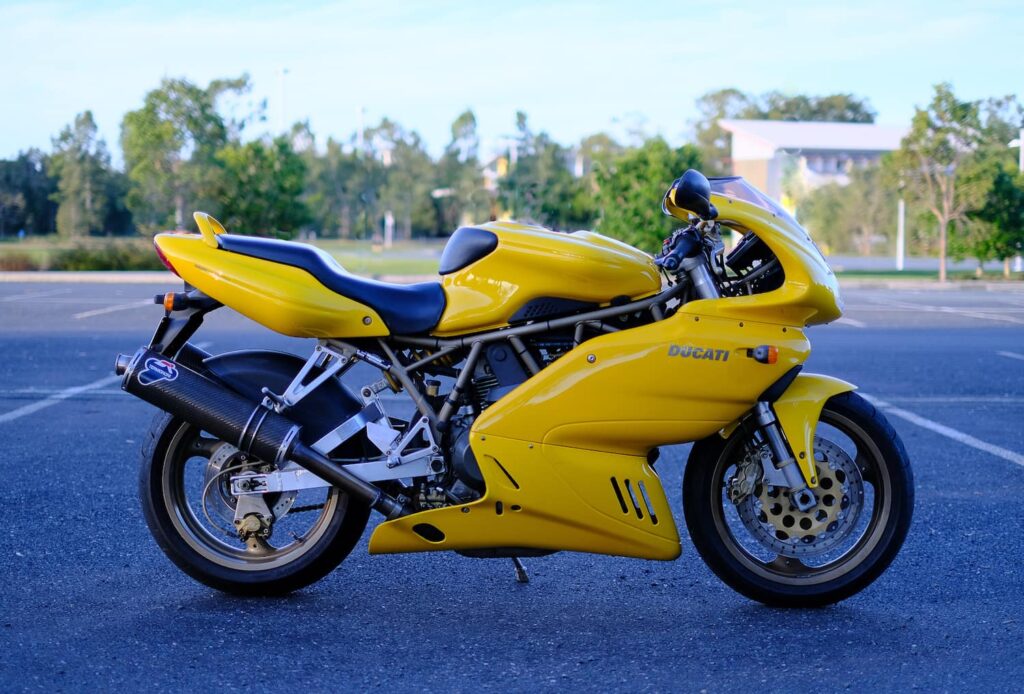
At least this photo of the yellow Ducati in front of blue-ish concrete and green trees has nice colour balance!
Take a landscape side-on or diagonal photo at hip height
In motorcycle photography, the side-on photo is one of the most common you’ll see. It’s often the leader photo of a review about a motorcycle.
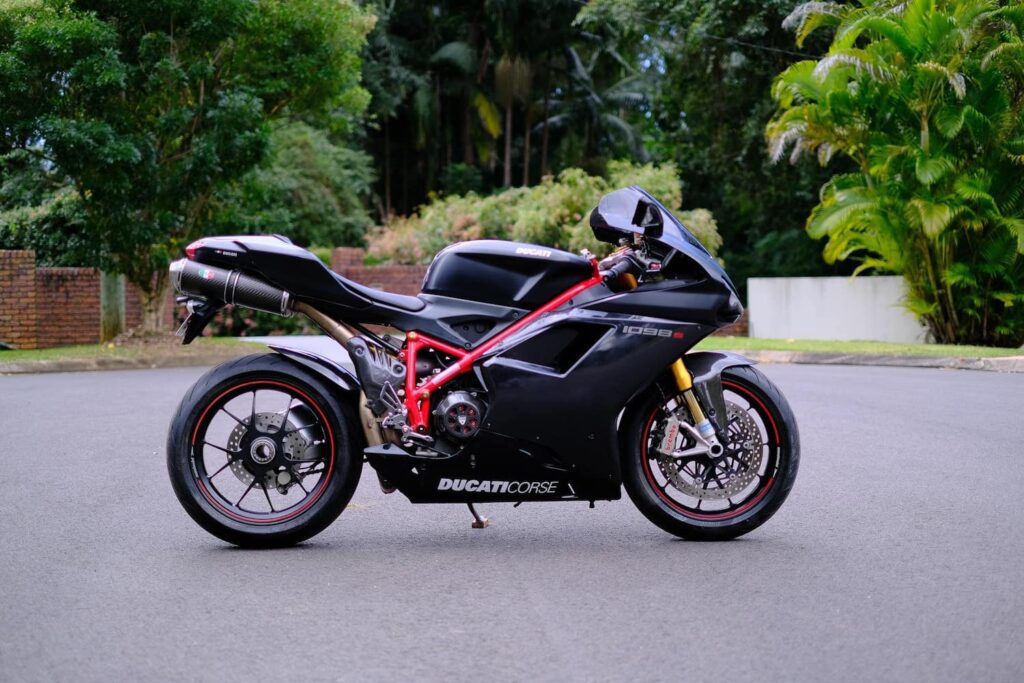
The angle lets you see a lot about a motorcycle, including where the controls are (how sporty it is) and the aesthetic shape of it.
For example, here’s the leader photo of an article about the Aprilia RS660 (a motorcycle I’m quite excited by in 2021) by Cycle World:
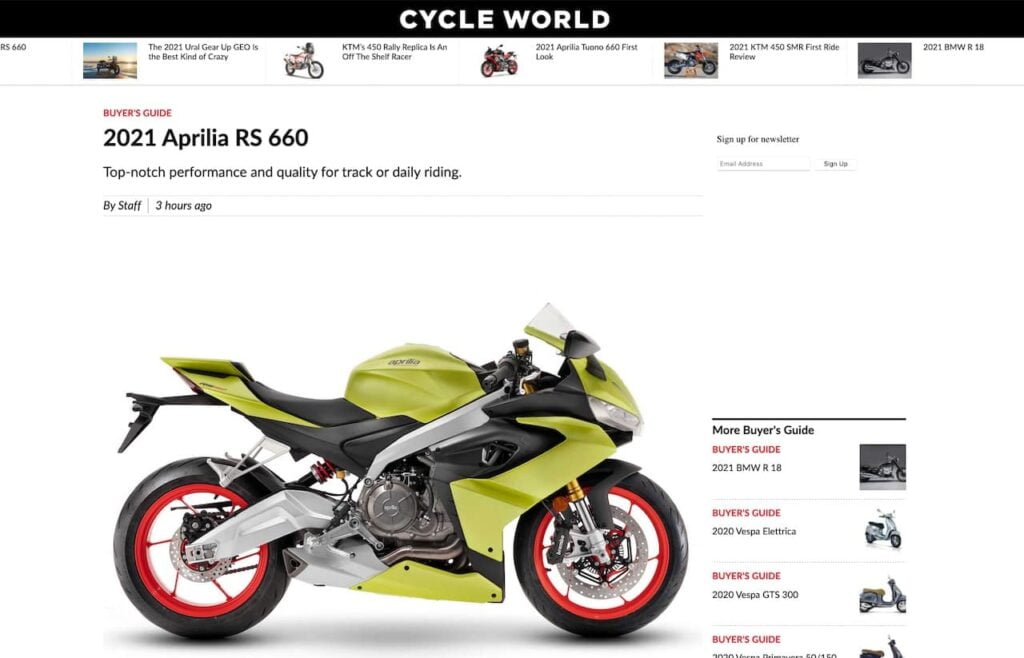
By the way, a relevant motorcycle photography tip is to keep the orientation in landscape mode for the majority of the photo shoot if it’s all going to be viewed in one place, like in an ad or on Facebook. When photos keep switching between landscape and portrait formats it becomes a bit harder to flick through.
Include detail shots of your motorcycle
An important motorcycle photography tip for anyone selling their bike is to take up-close detailed shots of the bike.
This doesn’t mean macro. You don’t have to hyper-zoom into every bit of the bodywork. But if there are cool features to share, like a dry clutch cover on a Ducati or machined controls, then make sure they’re visible.
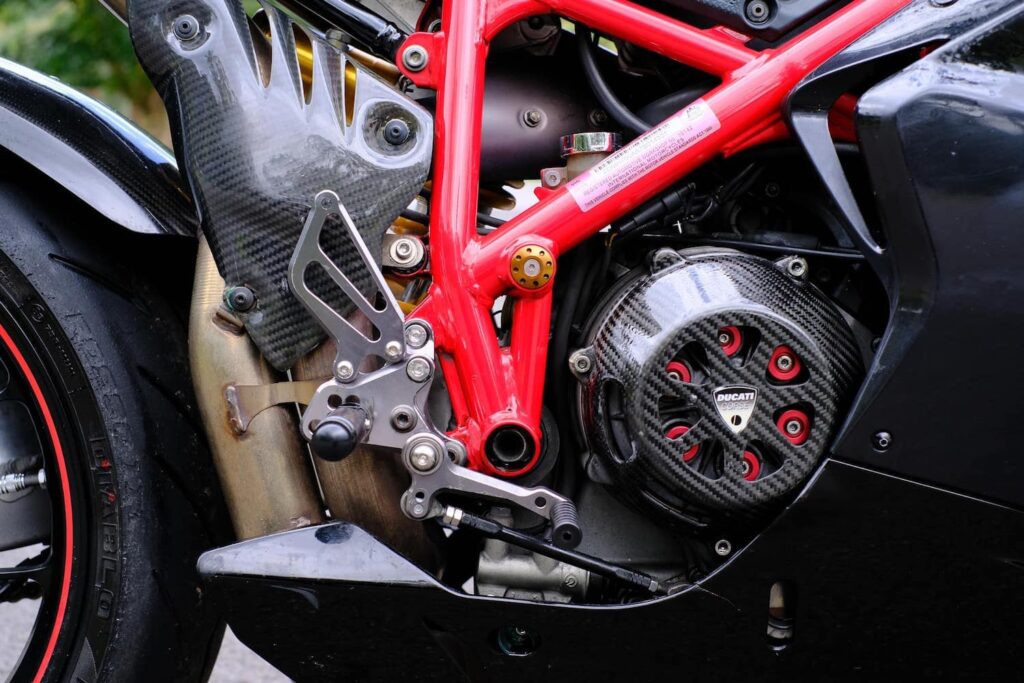
The reason for detail photos is twofold:
- You should showcase things that are important and might increase or decrease the value (decrease would be like a dent)
- Often websites decrease the resolution of a photo. So if you upload something with a resolution of 5000 pixels wide, they might reduce it to 1000 pixels, and then compress it. So users won’t be able to zoom in themselves.
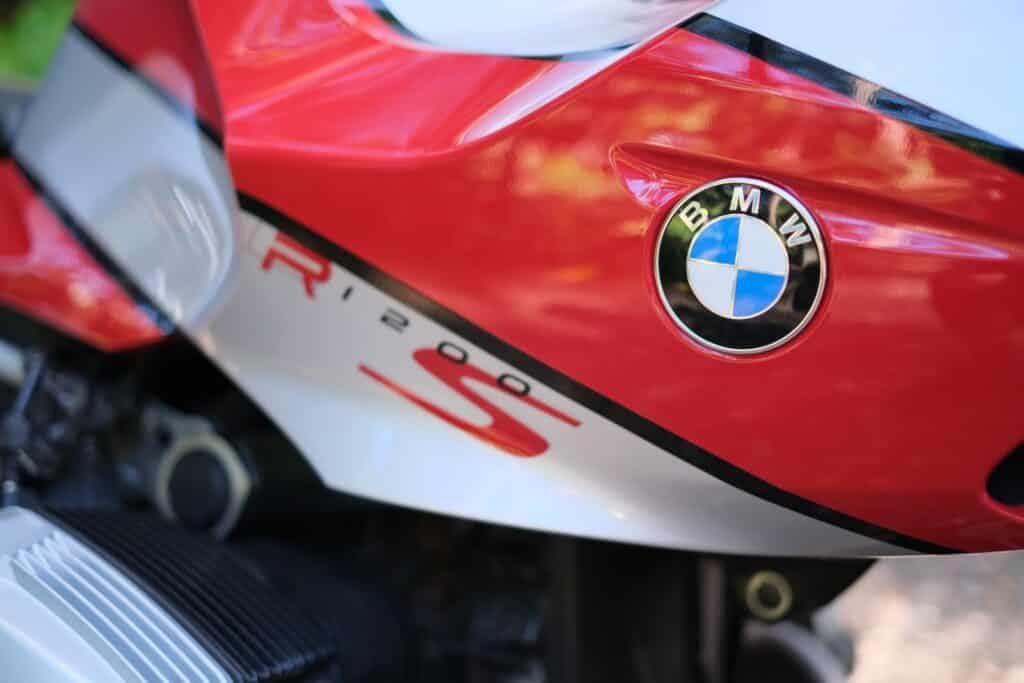
In the following shot, the detail of the BMW logo let me showcase the quality of the paintwork on my BMW R1200S.
Be thoughtful in your composition
“Composition” is a vague word, I know. What I mean by composition is: Examine the photo you’re about to take and think “Is the photo I’m taking of a thing actually a photo of the thing, or a photo of something else, or the thing and something else, or of many things?”
For example, you’re taking a photo of your motorcycle. Frame your photo. Now think: “Is this a photo of a motorcycle?” Or is it a photo of… something else?
Usually, being thoughtful in your composition simply means
- Put your motorcycle in the middle of your photo (* see note below). Make it the clear subject.
- Show as much of the motorcycle as possible — i.e. all of it, unless you’re taking a detail shot.
- Opt for more sky above it rather than more ground, to keep the observer oriented, and
- Make sure the photo is level, not slanted (even slightly)
Here’s an example of lazy, poor composition in a motorcycle ad photo.
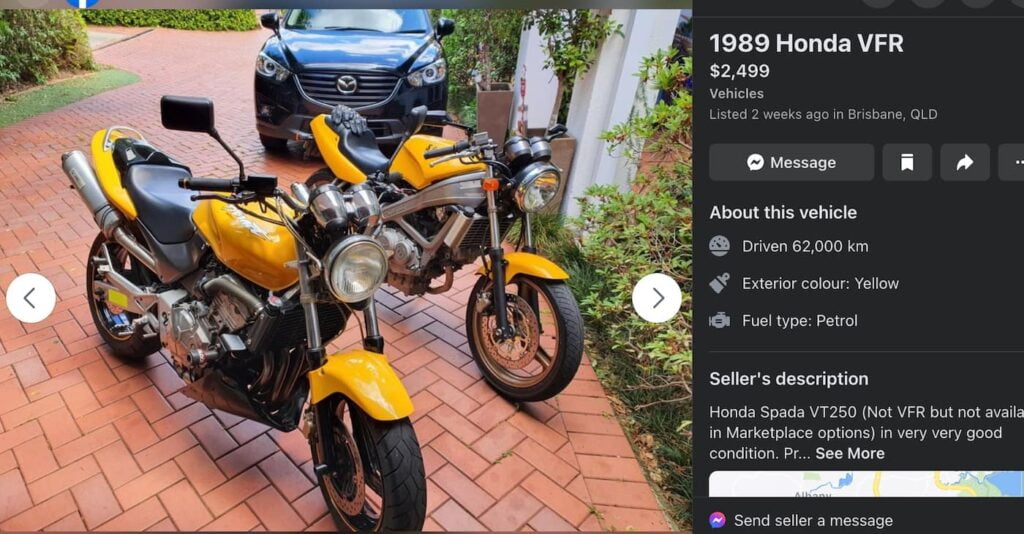
In this photo, you can’t even tell which motorcycle is for sale without referring to the text. What makes it worse is that it’s the one in the rear, which is a) partially obscured by the much nicer photo in the front (look at how one mirror covers the mirror of the other), b) has gloves on it, c) has various distracting things seemingly sticking out of it, like those plant vases.
Here’s another bad motorcycle photo of a beautiful motorcycle, a Ducati Supersport 1000DS.
This motorcycle almost sells itself. Such an awesome machine. But the angle of the photo gives me vertigo.
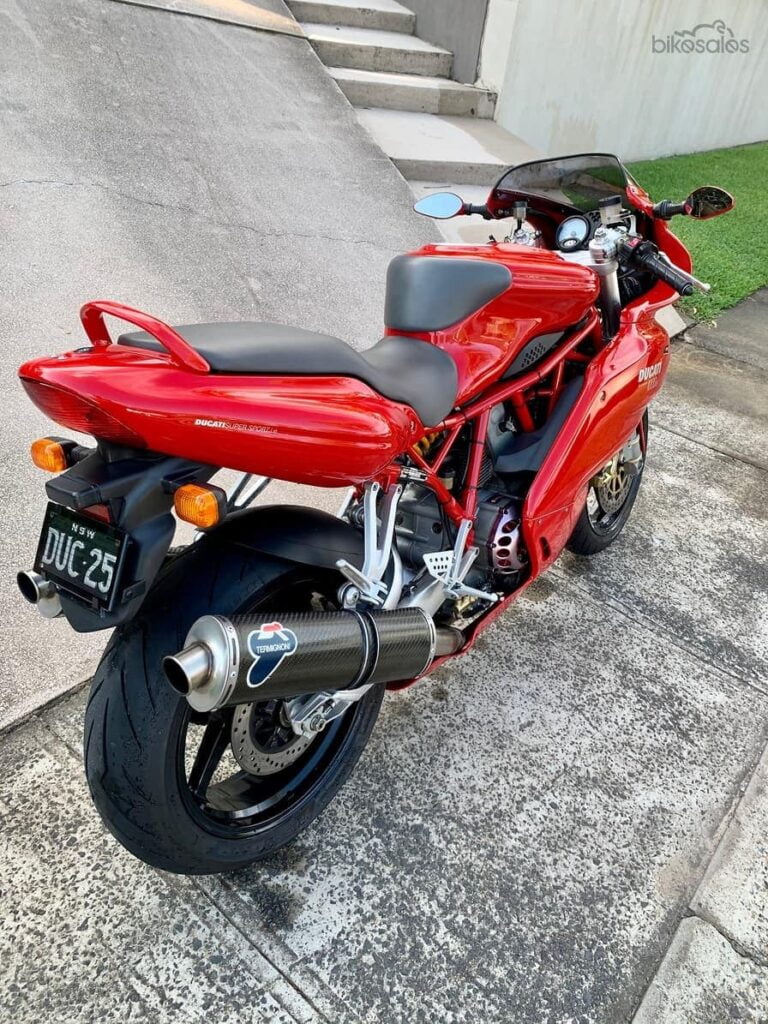
Look at all those crazy lines. I can’t tell if the path is on a slant, or how high up I am, and what’s going on to the left. It’s like an Escher. It’s really disorienting. And why is it in portrait mode? Because of weird stuff to the side? It’s not zoomed in enough to be just a photo of the Termignoni muffler, but not angled to be a useful photo of the motorcycle.
I find it intriguingly baffling that a Ducati owner would observe 6,000 mile/ 10,000 km valve service intervals and have the taste to own such a beautiful bike but not bother finding a good spot for a pic. (Probably because they’re too busy riding it…)
Here’s another bad one of a similar motorcycle, a first gen Supersport, now a classic:
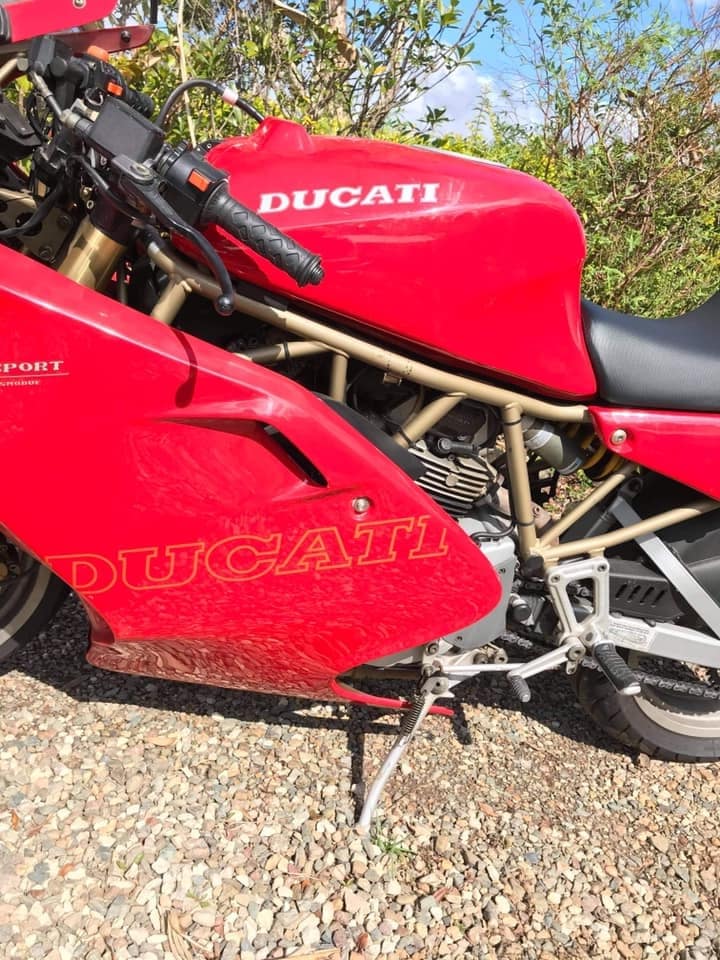
This photo (which was the leader photo in the ad, and often the only one people will see) just makes me upset. How could you take such a bad photo of such a beautiful bike? It’s at a weird angle, shows a random section of the bike, and is in portrait orientation (which may be excusable if you’re showing the front or rear only).
All you have to do to compose a photo well is (re-stating the above) to show the whole bike, keep the camera level, put the bike in the middle of the frame*, and don’t show too much ground.
To cleanse your palate, here’s a good (non-professional) photo of a Ducati Supersport 1000DS that does all that. Ahh.
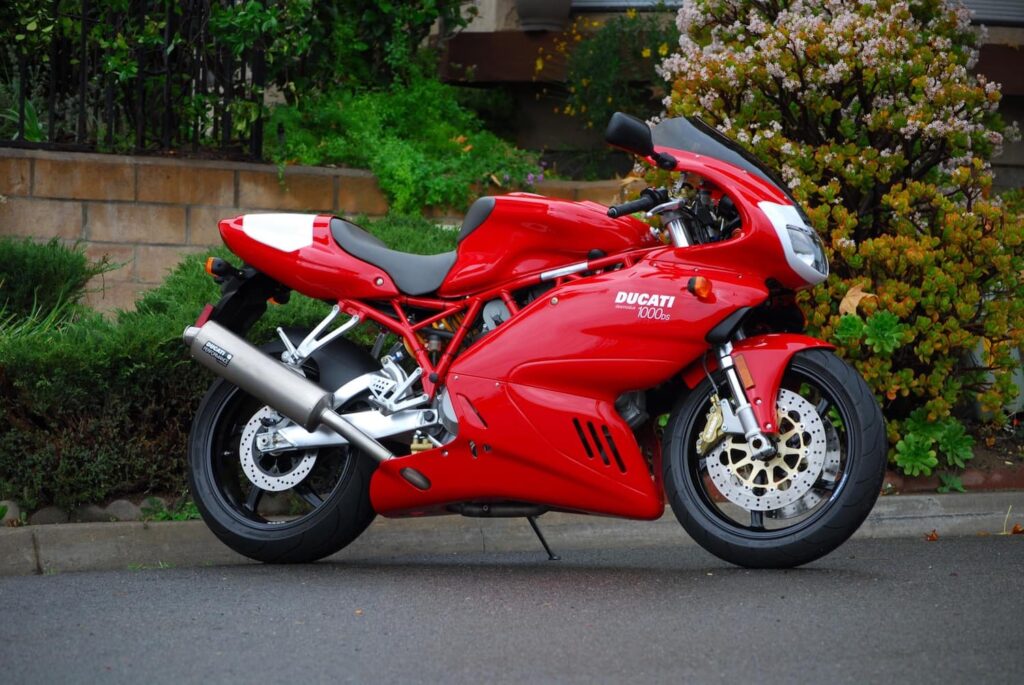
* Note — you don’t have to have the motorcycle right in the middle of the photo. You can leave some room in front of it, or in rare cases where there’s a beautiful background, something behind it. I don’t want to get into those compositions yet, because it’s a bit beyond what’s necessary to sell your bike, and those aren’t your basics that I’m trying to cover here.
Choose locations with colours that complement your motorcycle.
A counter-example to my black-on-grey Harley-Davidson shot above is that you should shoot in places where there is a complement or a contrast in colours.
For example, a more interesting photo than the drab grey one is this photo of the same motorcycle in front of a famous “Instagram wall” in Los Angeles (I didn’t know it was famous! I was just riding around randomly looking for a clean wall).
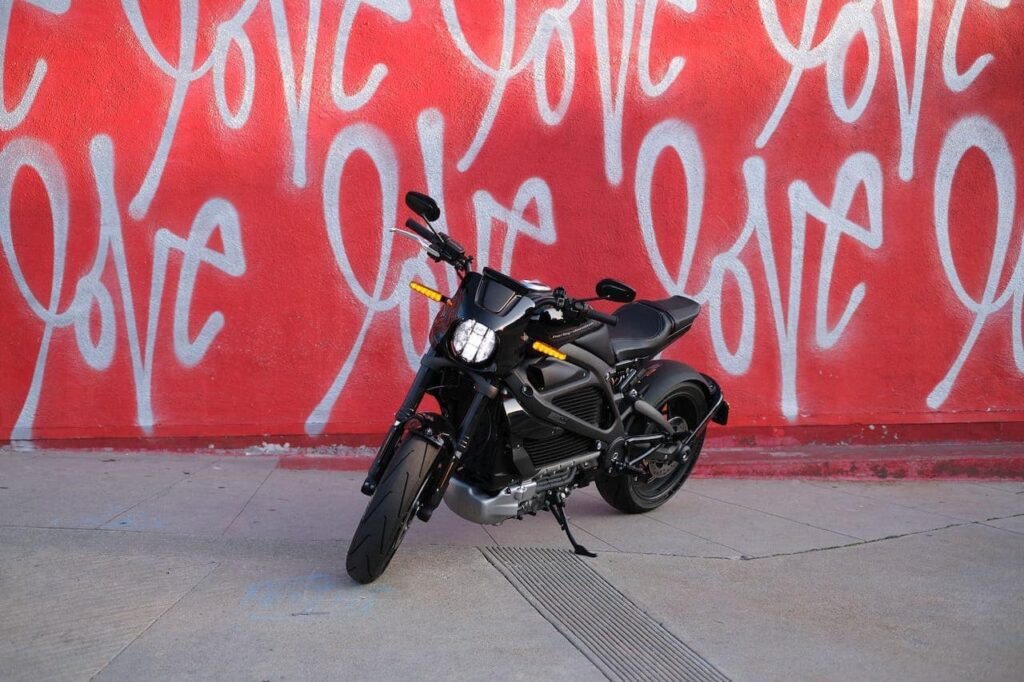
It’s hard to really complement black bodywork, but at least the red makes the photo more lively!
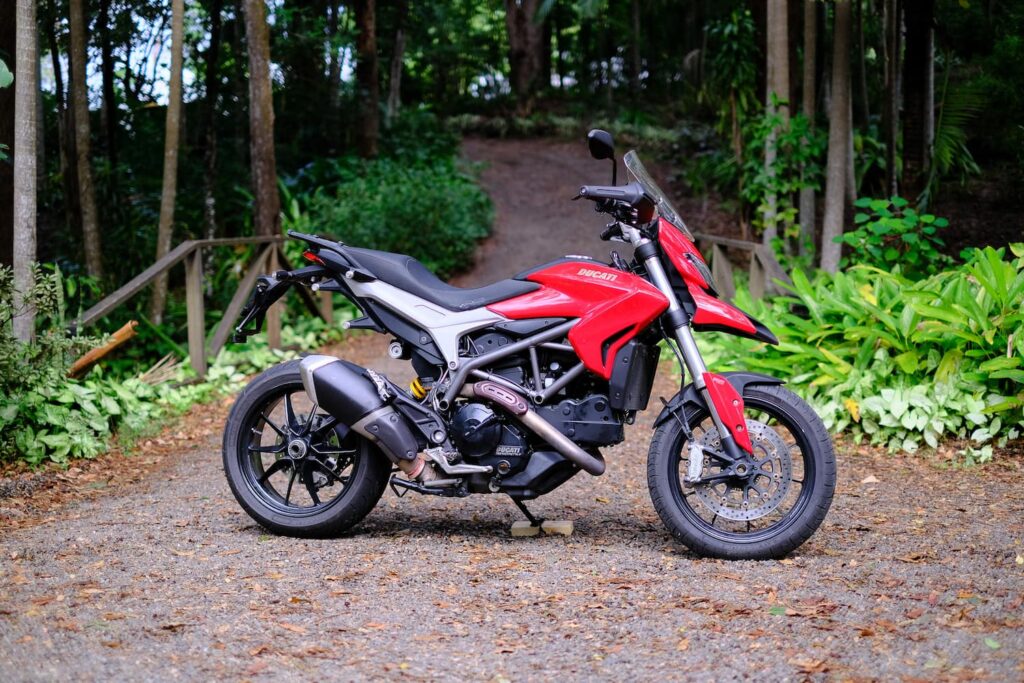
Another example is this photo of a Ducati Hyperstrada below. The bike’s red, black, and silver stands out against the grey and green of the background. (Which is a little cluttered, I know.)
Make sure your motorcycle is clean… but move it from the place where you were just cleaning it!
People do often clean their bikes before listing them, but sometimes they just leave them in a pool of water. Don’t do that! Lazy motorcycle photography does an otherwise good bike a disservice.
Here’s a photo of a good motorcycle, a stock Monster 620, but partially ruined by poor framing and leaving it in a puddle of water.
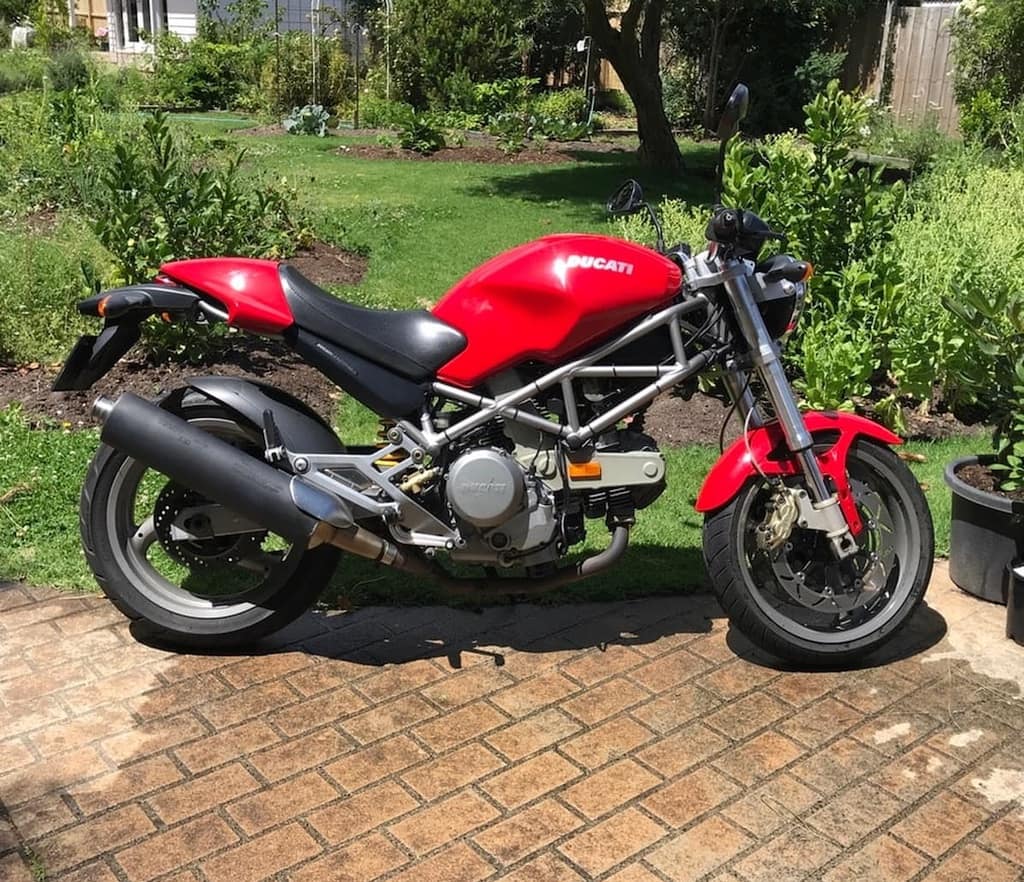
Yes, it’s great that you just washed it. It shows you care. But when there’s a pool of water on the ground it distracts from your motorcycle and does a disservice to it. Also, if you just washed it for the photo, it’ll alert buyers that maybe you hadn’t washed it in a while, or that it has errant bits of oil you just cleaned off. (that’s definitely how I read it).
Finally, I can’t help but shake the thought that the motorcycle just wet itself.
Keep the motorcycle as upright as possible.
Motorcycles lean over when they’re on their side stand, and it can sometimes obscure important details. So try to keep your bike upright.
There are three common ways to keep a motorcycle upright for photography:
- Use a centre stand if you have one (most motorcycles don’t)
- Put a small bit of wood or anything about 3cm thick under the sidestand’s foot
- Use a track stand to keep the rear wheel in place
I prefer not to use a track stand purely out of convenience. If you want to take all your photos in your home garage, or if you want to ride somewhere and take the photos there, that’s fine. Oh, if you’re taking photos of a track bike then it might be really great!
In the following photo, I use a wooden block to keep my R1200S upright. Keeping a motorcycle upright is especially important when taking a left-hand-side profile photo, because otherwise it may be too far leaned over.
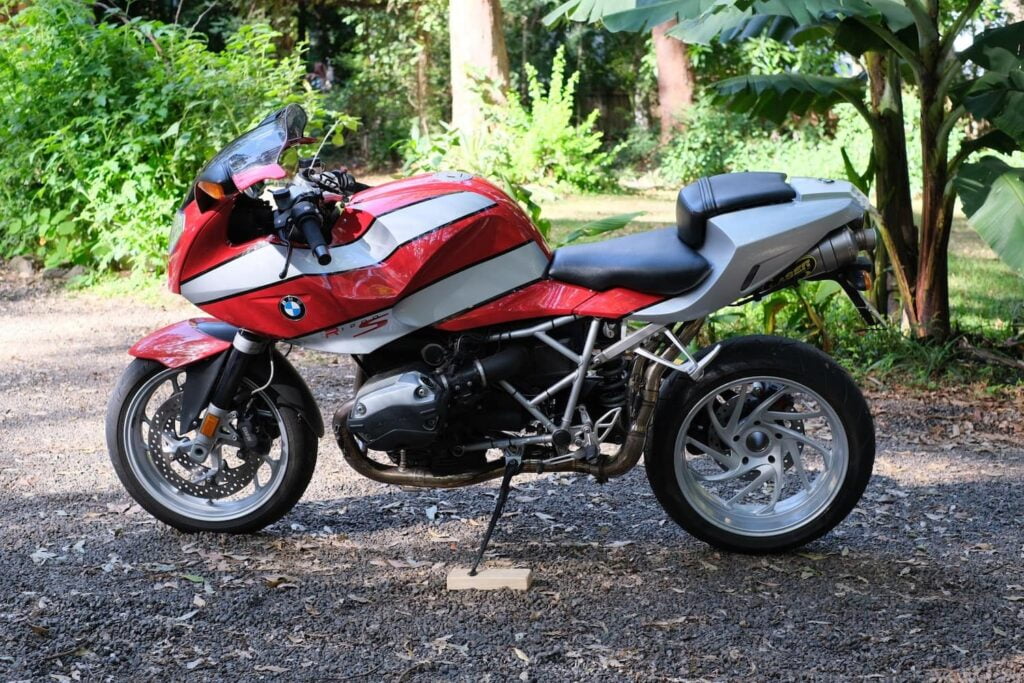
So my motorcycle photography tip here is to carry a small block of wood in your rear seat storage. Stick it under the side-stand if you ever want to take a pic, and the bike will be slightly more upright without being dangerously so.
Aside from helping with photography, it’s good if you ever have to park on an angled road, or if you ever are parking on soft ground.
Make sure the whole vehicle (or most of it) is in focus.
A common motorcycle photography error is to be lazy with framing, or to try to take a “cool” picture, that doesn’t capture the whole motorcycle… but also isn’t a detail shot.
I did this when selling my first motorcycle, for example. Hey, it was 2001, and I didn’t know anything. The following is an example of what NOT to do:
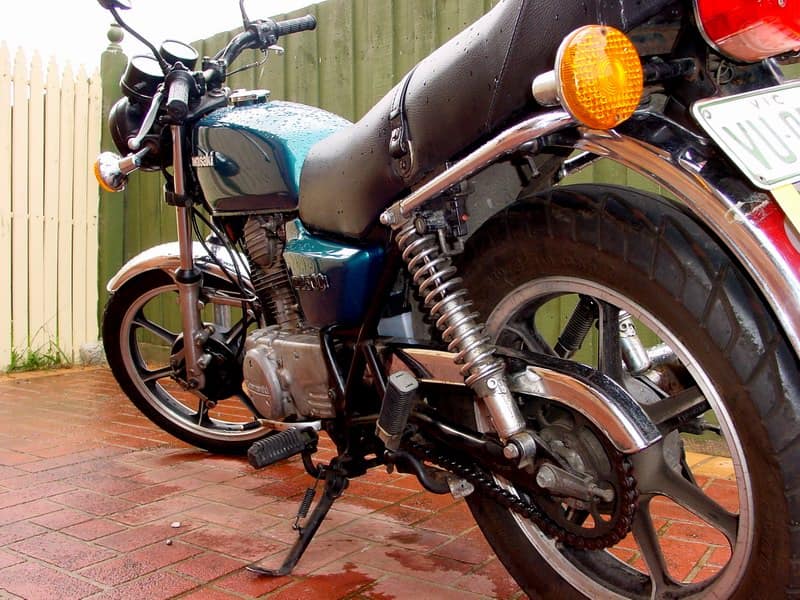
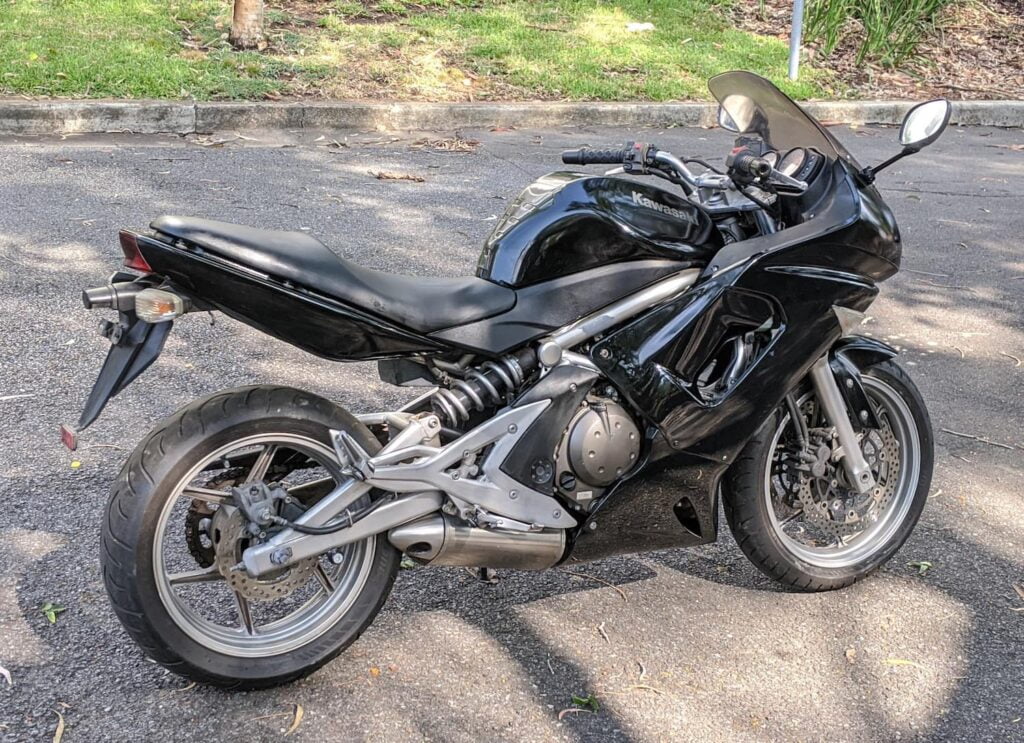
Almost any other photo of a motorcycle is a better example. The below is an example of a photo that isn’t particularly great, but at least the whole motorcycle is visible — so it’s an improvement on the above.
Optional: Put text comments to explain what people are looking at
Sometimes, I like to make it really easy for anyone browsing an ad to know what they’re looking at.
Most people will describe details in the body of an ad. They MAY add supporting photos. But because people browsing ads often jump straight to photos, having text in photos to show what people are looking at can be very helpful.
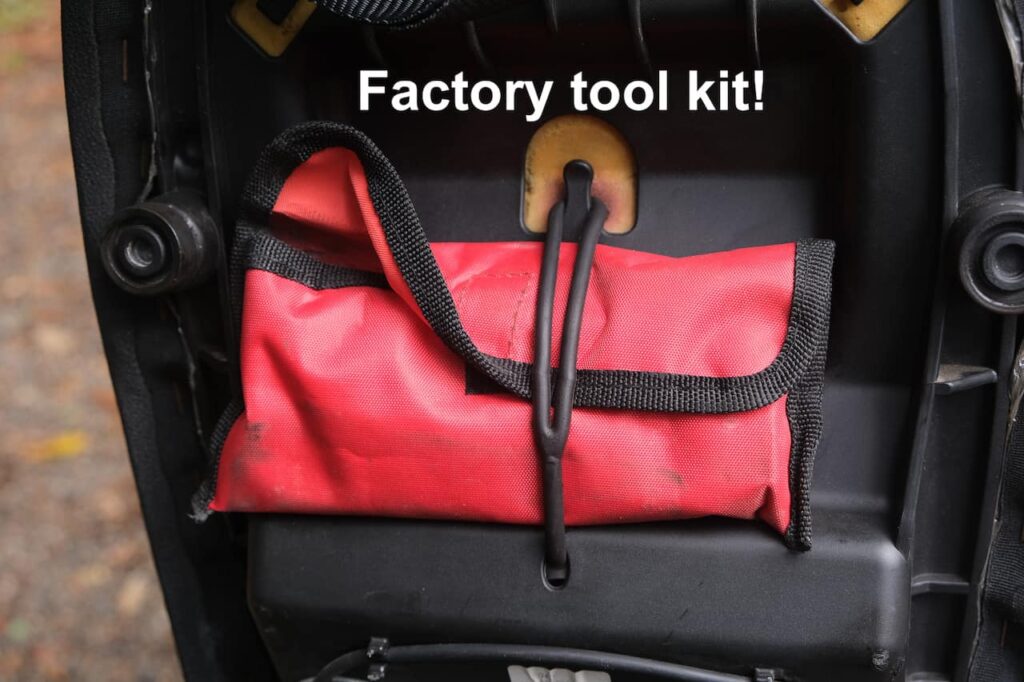

You don’t need to add text on most photos. Just on photos where the message might be unclear.
Bonus: Take video if you can!
This isn’t so much about motorcycle photography per se… but it relates in that you’re using a camera and you may as well do this while you have the opportunity.
Some platforms let you show a video to advertise your motorcycle. Take advantage of this!
Even if they don’t, a video of the motorcycle running on YouTube is a really great signal that it works. It would answer a lot of questions people have, and encourage people who are genuine buyers to come and visit.
As a bonus, if your motorcycle sounds amazing (pretty much a prerequisite for me), a video will let you showcase that!
A simple video starting the motorcycle and walking around is fine, like this one:
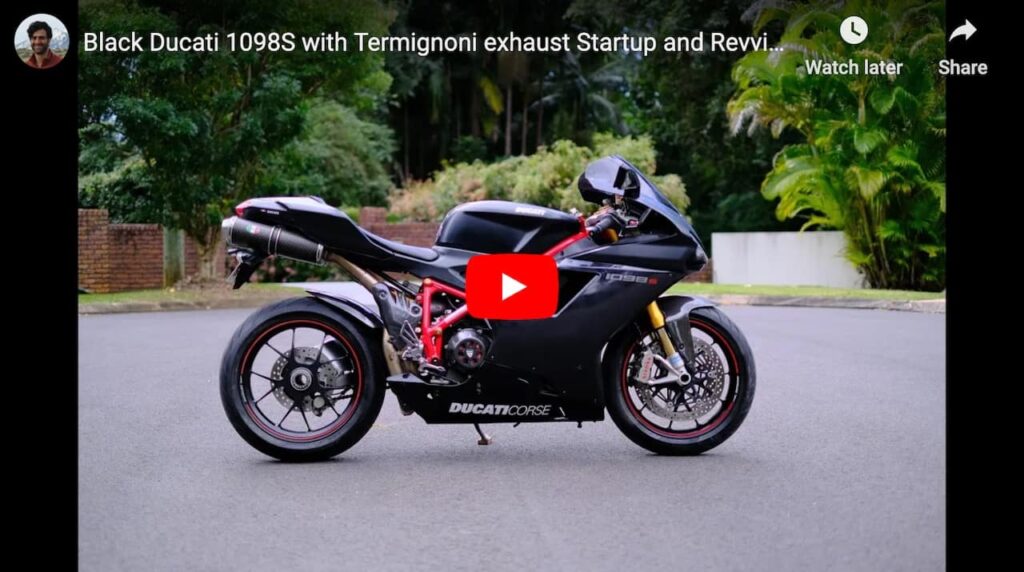
A video of your motorcycle shows
- That the motorcycle starts and runs
- The absence (hopefully) of any weird engine sounds
- What the exhaust sounds like from different angles
Of course, it can’t show that everything in the motorcycle works well. A proper test would involve starting the motorcycle cold, warming it up, and taking it for a test drive, and testing the charging system.
Got another motorcycle photography tip? Drop a comment.
As more tips come to mind, I’ll put more down here.
But if you have any ideas, I’m all ears.

