I recently installed HeliBars (comfort handlebars) on my Suzuki Hayabusa (why a Hayabusa? See the buyers guide here).
There are few HeliBars installation guides out there, plus instructions with the kit, but they’re a bit vague. Some people take their bike to the mechanic to have them installed, but it takes so little time that I took some extra pictures and am writing out this guide for the “absolute beginner”.
Installing HeliBars is an easy job. But in any motorcycle maintenance task, there’s stuff that goes wrong. You might not have a tool, or a certain solvent, or time, or space. A job that people on forums say took 15 minutes often takes me an hour as I have to go rummaging through toolboxes for something, or go to the store to buy some product.
So that’s why I’m making this “extremely clear and easy” install guide for Heli-Bars. You can show your support for this article and the time I put into it by buying your Heli-Bars via this site. It means I get a little sales commission (which otherwise goes just directly to the seller).
I should point out that some people are just against HeliBars, risers, or other modifications to motorcycle’s steering or comfort. It’s true that the Suzuki engineers know what they’re doing, and maybe there are just other motorcycles better suited. But heck, I like sportbikes, and I know my limits, and I enjoy doing easily reversible modifications that can improve my quality of life. Everyone can find their own balance in that regard.
Note: Motofomo is reader-supported. If you buy some of the products that we link to, we may earn an affiliate commission, which otherwise goes to the marketplace (e.g. Amazon).
Are you obsessed with motorcycles?
Well, I am. That’s why I created this site — as an outlet. I love learning and sharing what others might find useful. If you like what you read here, and you’re a fraction as obsessed as I am, you might like to know when I’ve published more. (Check the latest for an idea of what you’ll see.)
What are HeliBars?
HeliBars are a specific brand of elevated bars that have a very good reputation in the motorcycling community.
There are other brands of bar risers — there are even no-name brands you can buy on eBay that are either clones of HeliBars or adaptations of other brands. This is common on eBay (or other platforms). Sometimes the factory sell non-branded “seconds”, even, made to the same spec as a brand’s bulk order.
But when it comes to motorcycle components on which safety depends, reputation is very important. I wouldn’t mind too much using off-brand minor parts like a replacement bolt kit, or fairings for a track bike. For steering componentry though, I’d rather have a brand that many people have used.
OK enough with the justification of spending over $150. HeliBars on the Hayabusa make these changes to the position of handlebars:
- 1 5/8″ (41mm) Taller
- 1/2″ (12mm) Rearward
- 1/2″ (12mm) Wider Overall
By moving the bars up and to the back, they make a minor but still very perceptible change to the riding position.
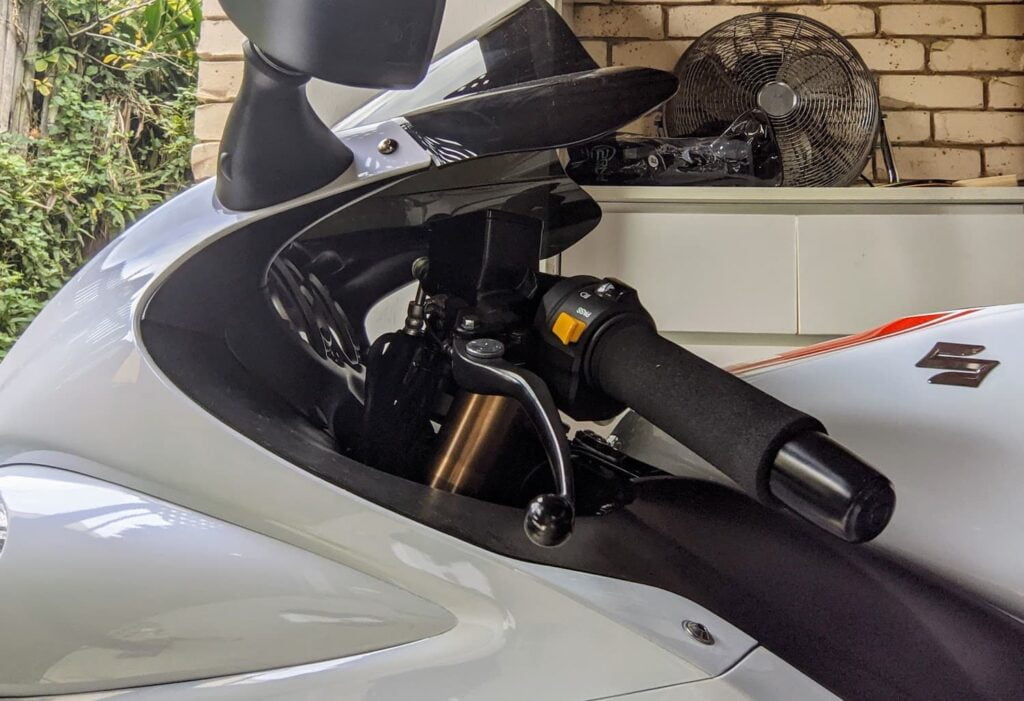
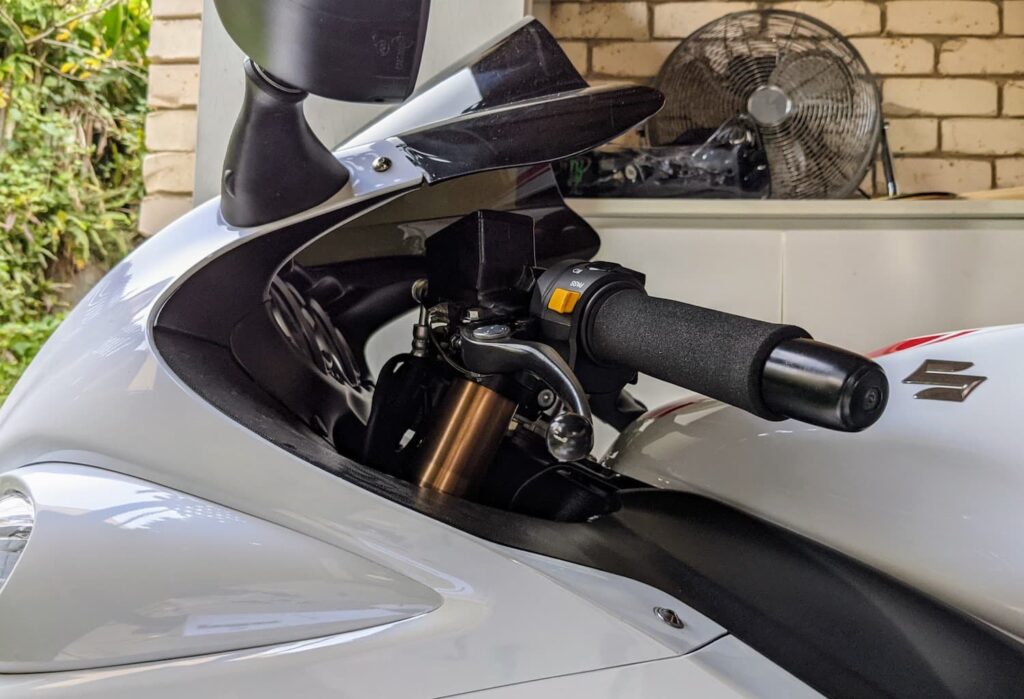
Hayabusa Heli-Bars — Before and After pics
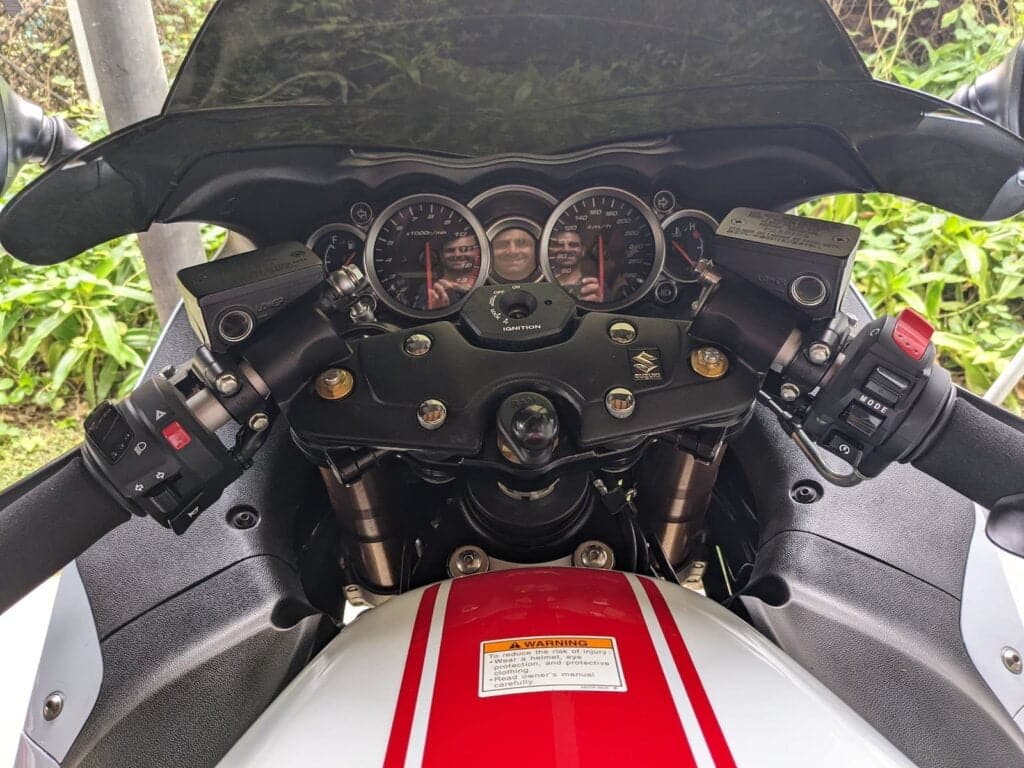
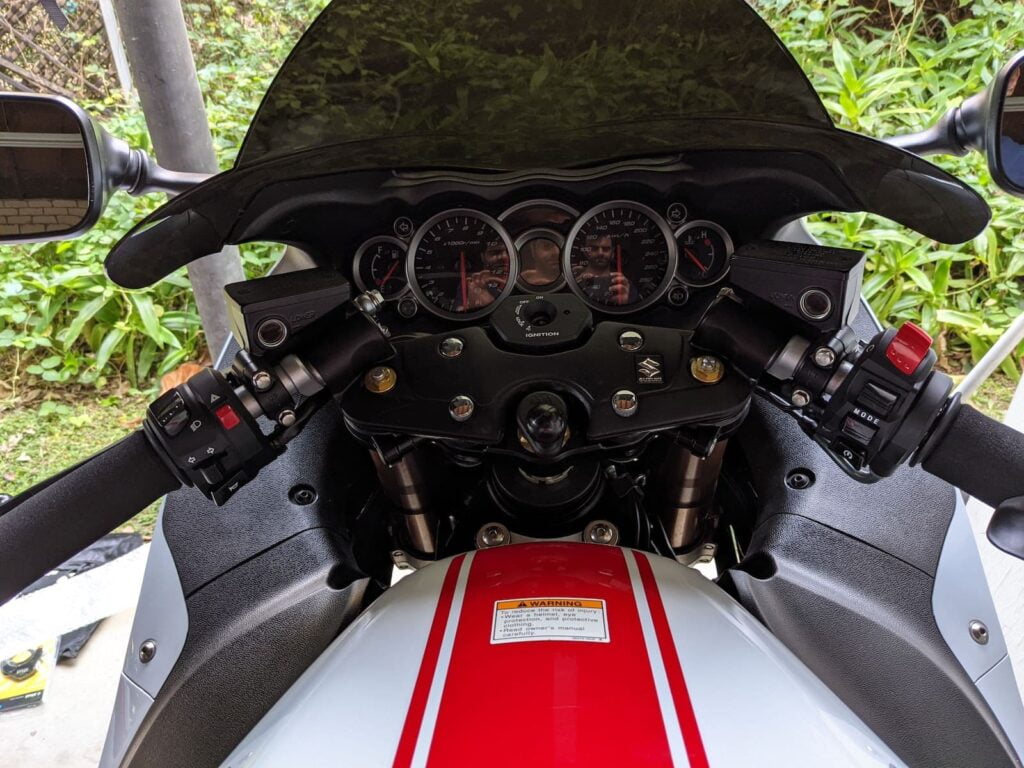
The below photos show before and after pics installing HeliBars on the Suzuki Hayabusa. Took quite a few tries to get the same angle (I was sitting on the bike).
As you can see, the bars are higher, flatter, and angled backward. The position on which your hands rest is decidedly more comfortable.
HeliBars makes different kinds of bar risers for different motorcycles. It depends how the handlebars or clip-ons attach to the bike. But the effect is generally the same — more comfort without interfering with the bike’s systems (windshield etc.)
HeliBars vs GenMar risers
One common alternative to the Helibars are GenMar bar risers. These are both high-quality and well-respected products.
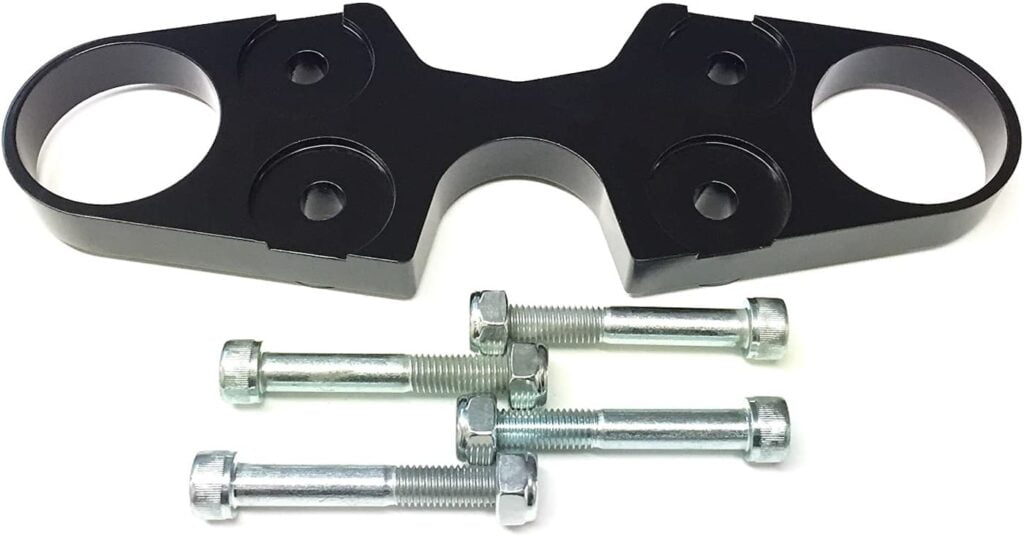
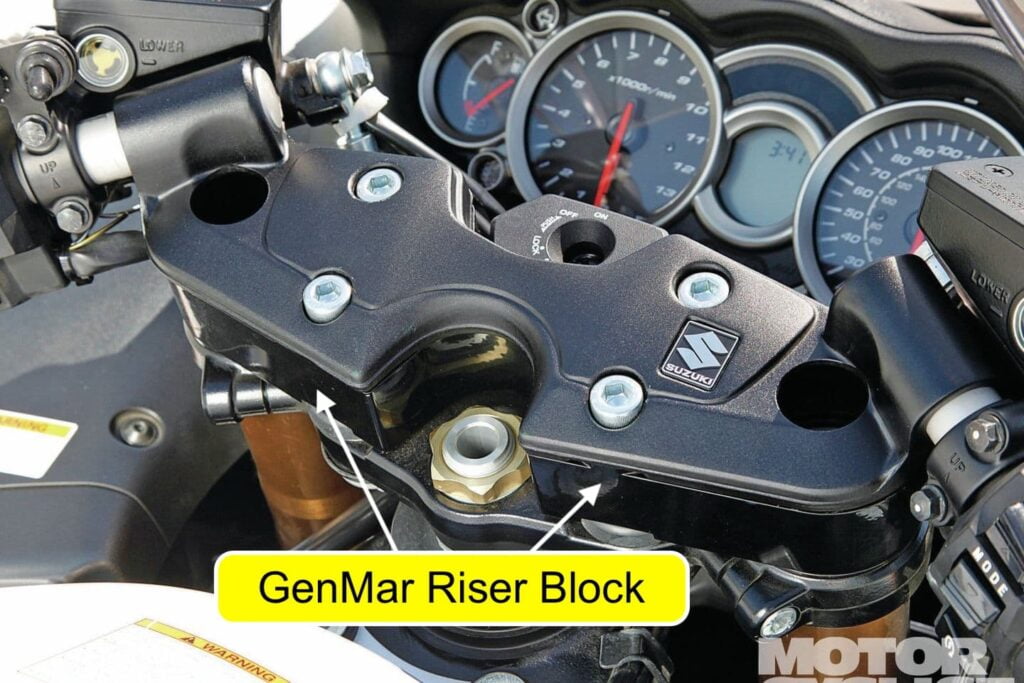
GenMar bar risers bolt under the clip-on handlebars and elevate the bars vertically (and thus back a bit because of the rake of the forks). It matches the design of the Hayabusa and also looks very clean when installed.
GenMar risers are much easier to install (you don’t have to take anything off the handlebars) and offer a lot of the same comfort benefits. Many people in the Hayabusa community install both Helibars AND a 3/4-inch GenMar riser plate for maximum benefit without having to do any re-routing or replacement of brake/clutch lines, or cutting away any of the windscreen (it become necessary after the 3/4 inch mark).
GenMar is another very reputable brand in the motorcycling community. However, their website is down, and their Facebook page seems pretty inactive, so I didn’t get as strong a feel for the product as I did for HeliBars, who are still producing products for new models of motorcycle. That’s the main reason I went with HeliBars.
Installing HeliBars on a Suzuki Hayabusa — Detailed guide
I usually try to do all maintenance work using only what’s in my tool roll. This time, I needed a couple of extra tools — the two screwdrivers, and a torque wrench (which I didn’t use because I realised I had semi-permanently lent it to my brother a while back).
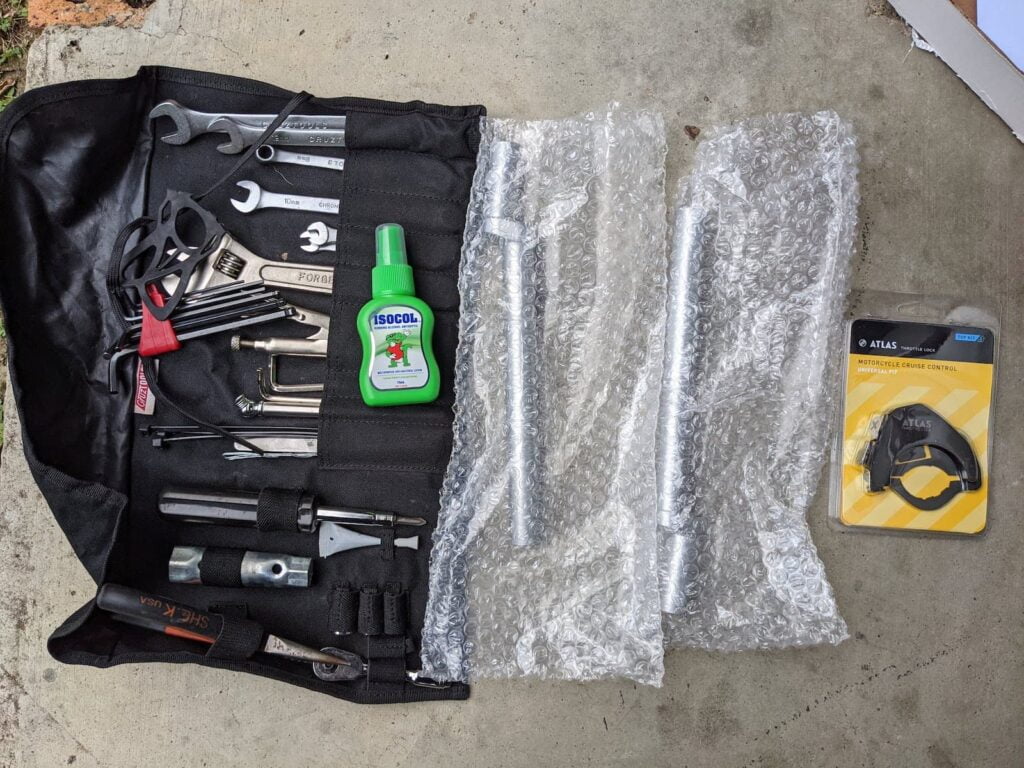
Tools you need:
- Small Philips head screwdriver
- Long thin flat-head screwdriver
- Metric Allen Keys (you’ll just use the 5mm)
- 8mm wrench
- Isopropyl alcohol (“rubbing alcohol”, available at pharmacies and supermarkets)
- Low-range torque wrench (semi-optional) that can measure 5 ft-lb (8 Nm) and take hex bits (5mm)
You have to do this procedure on both sides of the motorcycle, but do it on one side at a time, so you can use the other side’s handlebar for leverage if you have to.
Start with the right hand side.
- Remove the bar-ends. You use your 5mm hex hey for this.
- Remove the brake master cylinder. You have to remove the two bolts with the 8mm wrench. This will also loosen/remove your brake lever.
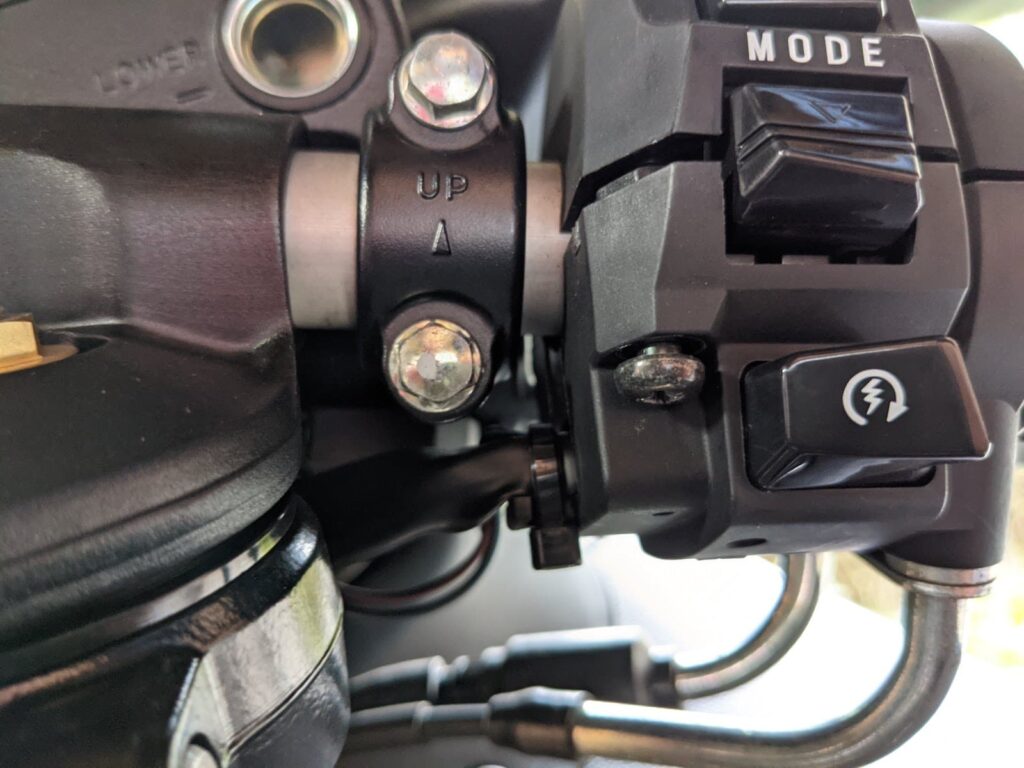
- Loosen the two screws holding together the ignition block. You don’t have to remove the screws altogether. It just has to be loose enough for the locating pin to become free of the bar (so it can slide out).
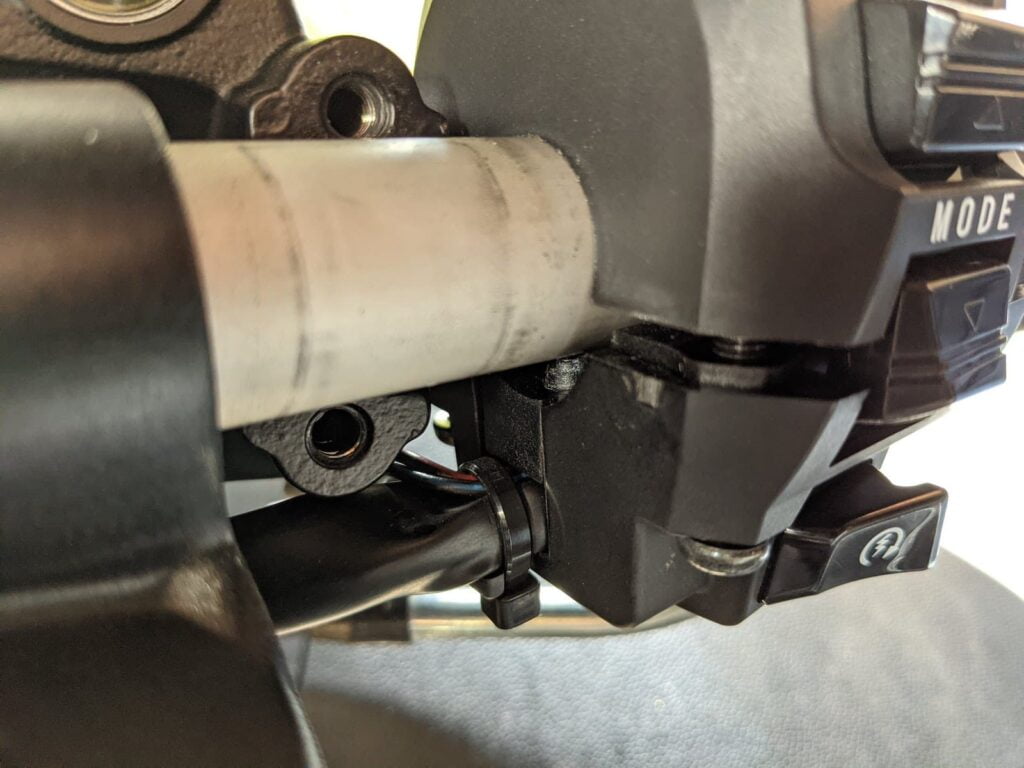
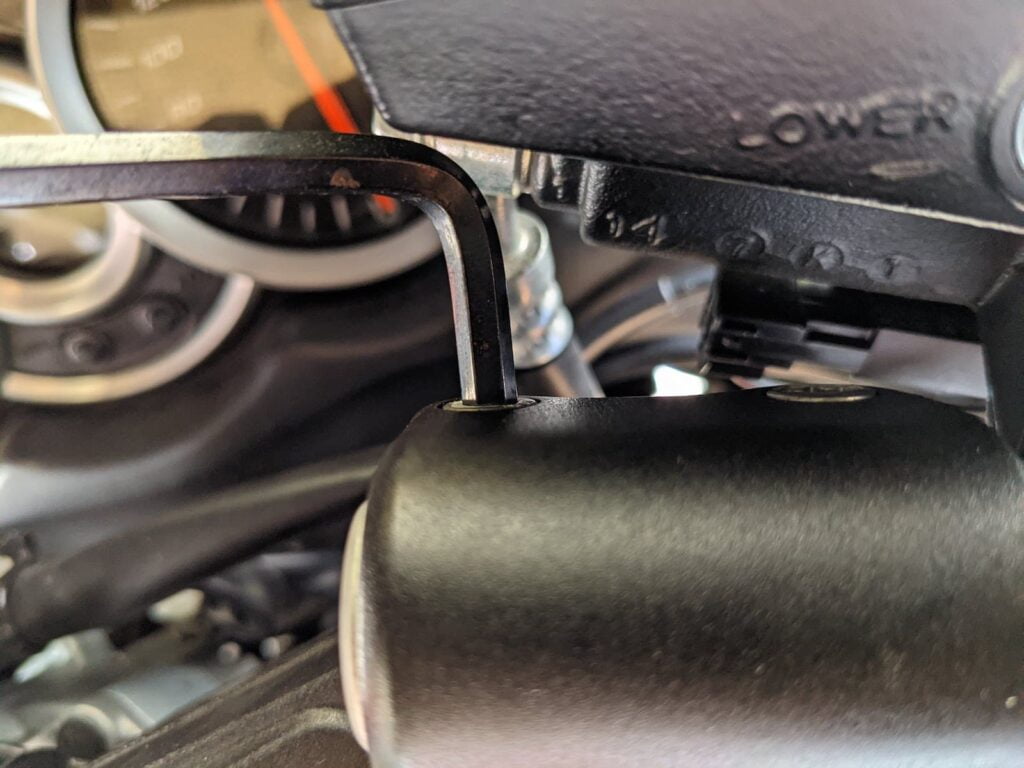
- Undo the two 8mm bolts, and loosen the two screws (you can see the front one in this pic
- Disengage the securing pin (you can see it touching the clip-on bar)
- There are two bolts behind the clip-on handlebar that hold it on. You have to remove the one that’s closest to the clip-on handlebar, and you can leave the other one (closest to the centre of the bike) in, just loosened.
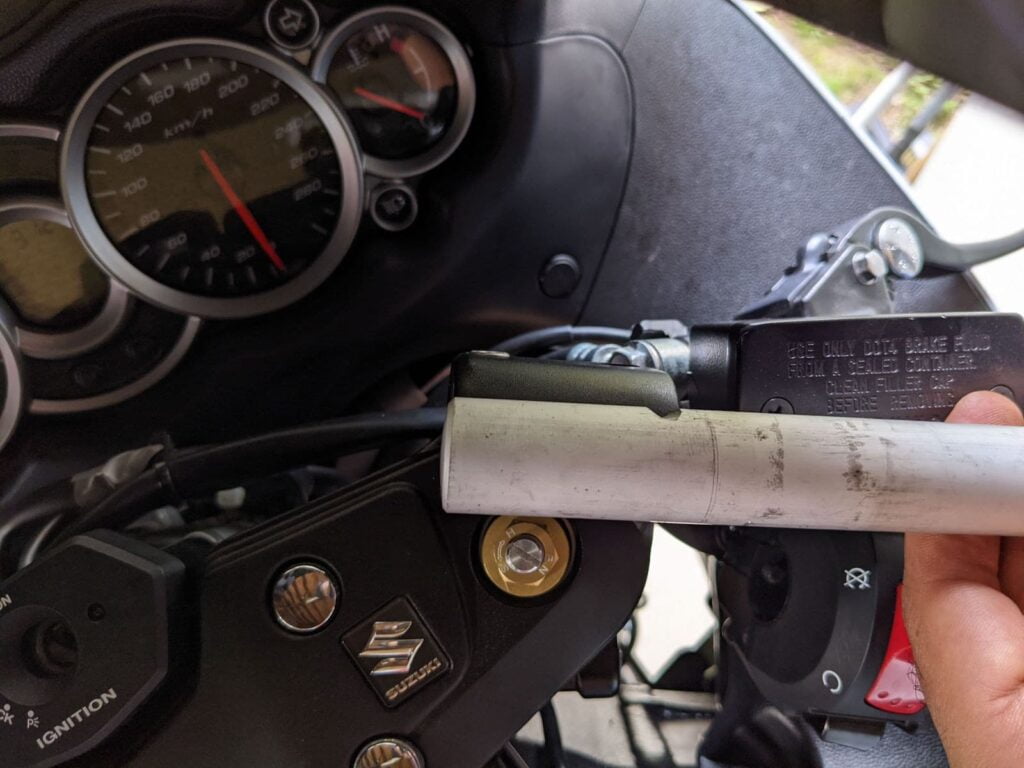
- Remove the clip-on handlebar. It should slide right out of the loosened components. Note the groove in the bar that was inline with the bolt that you fully removed.
- Groove for the bolt (original handlebar)
- Using a hex key to remove the rear bolts holding on the clip-on
Now, you have to install the HeliBar.
To install it,
- Insert the long part of it into the switch block and throttle tube, and then gently lever the short part into the clip-on holder.
- Align the clip-on handlebar with the holder, and insert the bolt you removed. Tighten them both down to 5 ft-lb (8 Nm) with a torque wrench. If you don’t have one, tighten them quite a bit without over-tightening… sorry, it’s hard to explain what that amount of torque feels like! But it’s definitely short of “as tight as possible”.
- Tighten the screws for the switch block.
- Re-install the bar end.
And you’re done with the right hand side!
The instructions say that you do the “same” for the left hand side, but there are a couple of important notes that will help install the left hand HeliBar on the Hayabusa.
- Just as with the right hand side, you have to remove the clutch master cylinder (same as the brake master cylinder on the right)
- Again, just as on the right hand side, loosen the switch block.
- You have to totally remove the grip for the right hand side and then put it on your new HeliBars handle bar. To remove the grip, use a long, thin screwdriver to break all the glue holding it on, and then spray some isopropyl alcohol (rubbing alcohol) to dissolve the glue. It should slide right off. I was skeptical, but it worked.
- On the new HeliBars handlebar, slide the control block over the handlebar before putting the new grip on.
- You don’t need any glue to put the new handlebar grip on. Many people have installed them and they just stay in place.
Review — How are the Helibars on the Hayabusa?
The first thing I thought was — is that it? It looks the same!
But when I placed my hands on the bars, I could immediately feel there was a difference. Referring up to the “test” above, I found that my hands were much closer to a natural position (that I’d want to be at speed). (See my guide to sportbike riding position for everyday riding.)
Riding with the HeliBars installed, I noticed that I did not have to use my core muscles as much to stabilise my upper body, and I didn’t have as much risk of resting on the bars as I did previously. My hand also didn’t go numb (although that happens only after long rides anyway, and I try not to let it happen for safety reasons).
Importantly, the Hayabusa still looks very “stock” with the HeliBars installed. Here’s how the cockpit looks before and after.
- Standard bars (before HeliBars install)
- HeliBars installed
You can’t even tell that they’re installed. They don’t look less sporty.
When I coupled HeliBars with some adjustable rear sets (lowering the footpeg position), I actually found the riding position TOO upright and not sporty enough, so that’s a modification I didn’t keep.


Thanks, very informative! Putting some on tonight.
What adjustable rearsets did you use?
Cheap eBay ones that looked nicer in photos, but that I didn’t like aesthetically.