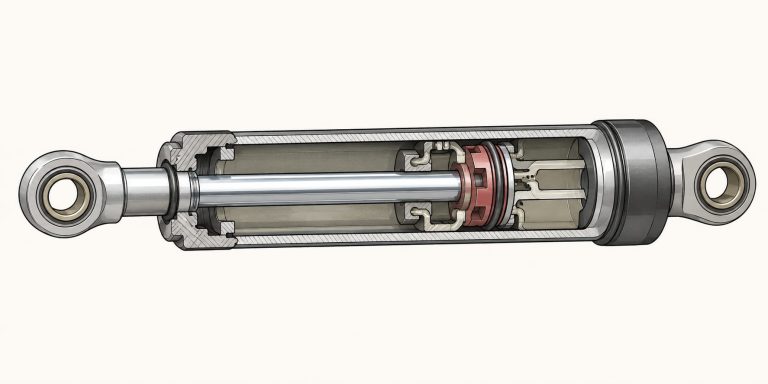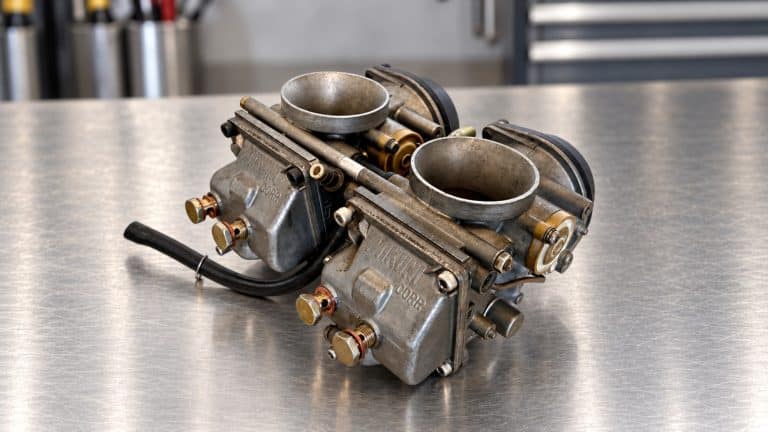

Motorcycle suspension setup can look like a dark art because the adjusters are small, the vocabulary is weird, and the effects overlap. But the basic job is simple: keep each tyre in contact with the road while holding the motorcycle in the usable part of its suspension travel.
You can make a surprisingly large improvement without replacing anything. Start with healthy tyres and suspension, record the current settings, set sag for the load you’re carrying, and then adjust damping one circuit at a time on a repeatable test route. Sounds a little boring, sure, but it can yield good results!
This guide covers road riding, sporty road use, track days, rough roads, adventure riding, luggage, passengers, and electronic suspension. It also explains when the screwdriver has reached the limit of its powers and you need different springs or a suspension service.
Quick version:
- Return the bike to its manual’s standard settings.
- Set rider sag with preload. Check that free sag remains sensible.
- Set rebound so the suspension recovers promptly without bouncing or packing down.
- Use compression damping to control how quickly it uses travel.
Change one thing at a time, in small steps, and keep notes.
Are you obsessed with motorcycles?
Well, I am. That’s why I created this site — as an outlet. I love learning and sharing what others might find useful. If you like what you read here, and you’re a fraction as obsessed as I am, you might like to know when I’ve published more. (Check the latest for an idea of what you’ll see.)
What You Can and Can’t Adjust
First, find out what your motorcycle actually lets you change. A basic bike (like most entry-level road bikes, and even many mid-tier bikes) may have only stepped rear preload. A more sophisticated fork and shock might have preload, rebound damping, compression damping, separate high- and low-speed compression damping, and ride height. Electronic systems may control some of those through a menu.
| Adjustment | What it changes | What it doesn’t change |
|---|---|---|
| Spring preload | Sag, ride height, and where the suspension sits in its travel | The spring rate |
| Rebound damping | How quickly the suspension extends after being compressed | How much weight the spring can sensibly support |
| Compression damping | How quickly the suspension compresses under bumps, braking, and acceleration | The underlying spring rate |
| Ride height | Chassis attitude and steering geometry without using spring preload | Damping |
| Electronic mode | Usually a damping map; on some bikes, preload or ride height as well | Whatever the system’s hardware can’t physically adjust |
The spring holds the motorcycle and rider up. Damping controls how quickly the spring and wheel can move. Preload changes the spring’s installed compression and therefore the bike’s resting position, but preload doesn’t turn a soft spring into a stiffer spring. This is the distinction that clears up most beginner confusion!
I often think back to some of my first-year university physics, where we learned about how springs work in a basic way. It’s hard to find a good and free resource online (Khan’s Academy used to be my go-to), but it might be worth your while to look it up in a physics textbook if you have one lying around.
For a deeper look inside telescopic forks, see my complete motorcycle fork FAQ. If the difference between sprung and unsprung weight is new to you, I also have a guide to motorcycle unsprung mass.
Before You Touch an Adjuster
Suspension settings can’t compensate for worn tyres, incorrect tyre pressures, loose steering-head bearings, seized linkages, leaking fork seals, old fork oil, a tired shock, a misaligned rear wheel, or a chain adjusted so tightly that it restricts suspension movement.
- Check tyres for squared profiles, damage, and age.
- Set cold tyre pressures for the intended load and use. Start with the motorcycle or tyre manufacturer’s road recommendation unless you have a sound reason not to (How about “I googled it”?)
- Check fork legs and the shock for oil leaks, damage, and sticky movement.
- Check wheel, swingarm, linkage, and steering bearings for play or binding.
- Check wheel alignment and chain slack using the workshop manual, not just the swingarm marks.
- Remove luggage you don’t normally carry, or load the bike exactly as you’ll ride it.
Yes, that’s a lot of setup, but that’s the preamble. If your bike is relatively new, most of it will be fine.
If the suspension is overdue for service, deal with that first. Old oil and worn internal parts make damping inconsistent, so today’s perfect click count may become tomorrow’s expensive fiction. My broader motorcycle maintenance guide explains why fork oil and suspension bearings are so often forgotten.
Tools That Make This Easier
- The owner’s manual (it’s usually all in there)
- A metric tape measure or sag tool
- A helper who can balance the bike and read the tape consistently
- A stand that can safely unload the front and rear suspension
- The correct screwdrivers, hex keys, sockets, and preload spanner
- A small zip tie for a conventional fork leg
- A notebook or spreadsheet
Use tools that fit the adjusters closely. Compression and rebound screws are small precision parts, not invitations to demonstrate grip strength.
Record the Baseline
Before changing anything, write down every setting. Most damping settings are recorded as clicks or turns out from fully closed. Turn an adjuster clockwise gently until it stops while counting the clicks. Don’t tighten it. Record the number, then return it to the original position.
Some adjusters have no clicks, some count turns, and some forks put compression in one leg and rebound in the other. A few adjusters work in the opposite direction. The manual wins every argument here, so check that!
Don’t begin at an arbitrary “one-third out” setting. Begin with the manufacturer’s standard setting unless the hardware or springs have changed. The manual’s baseline gives you a known, recoverable starting point.
Step 1: Set Rider Sag With Preload
Sag is how far the suspension settles from fully extended. It gives the wheel room to move both upwards over a bump and downwards into a dip. Too little sag can leave the suspension near the top of its travel and make the bike nervous or reluctant to follow depressions. Too much sag uses valuable bump travel and can alter steering geometry, ground clearance, and stability.
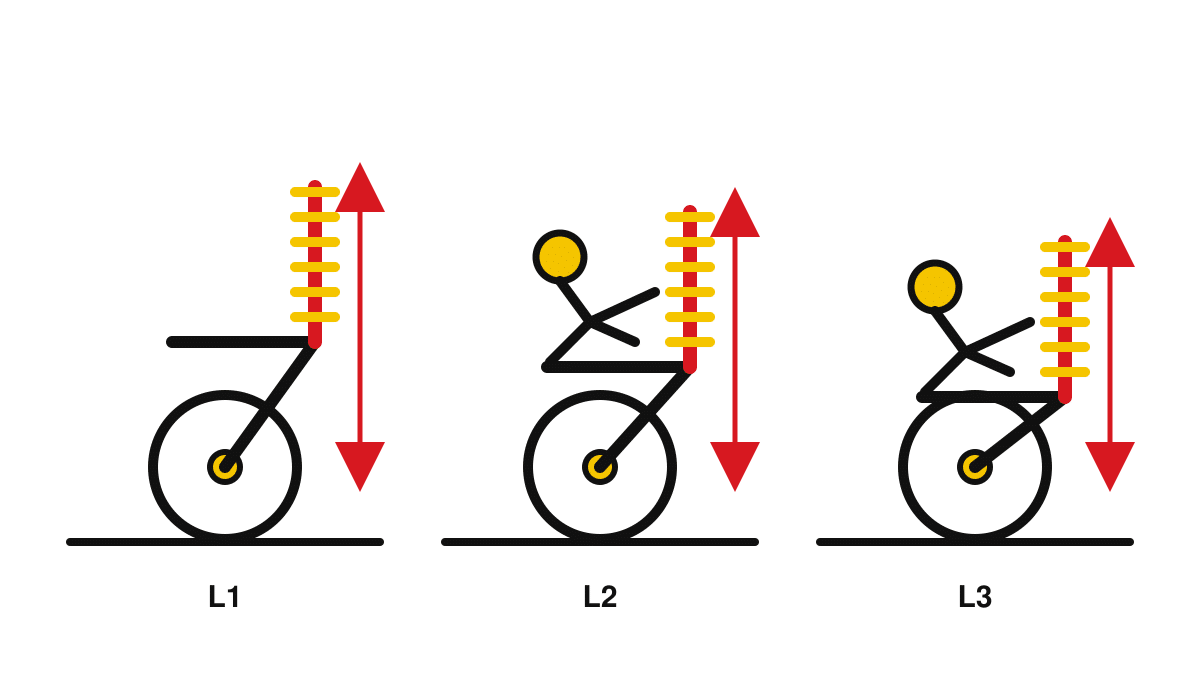
How to Measure Rear Sag
- L1, fully extended: Safely unload the rear wheel. Measure from the rear axle vertically to a repeatable point on the tail or frame. Mark the upper point with tape.
- L2, suspension approached from below: Put the bike on level ground with the intended rider, gear, luggage, and passenger aboard. Push the rear down, then let it rise very slowly. Measure where it stops.
- L3, suspension approached from above: Lift the rear slightly, then let it settle very slowly. Measure again.
- Average L2 and L3 to reduce the effect of seal and linkage friction. Rider sag = L1 − ((L2 + L3) ÷ 2).
Measure free sag the same way with the motorcycle upright but no rider aboard. The difference between L2 and L3 is the stiction zone. A large difference suggests friction or binding that deserves investigation. Race Tech’s sag procedure uses this averaging method and flags a rear stiction zone beyond roughly 4–5 mm as a reason to inspect the linkage.
How to Measure Front Sag
Use the same fully extended, push-down, and lift-up sequence at the front. On a conventional fork, measure exposed stanchion length between the dust seal and lower triple clamp. On an upside-down fork, measure between two repeatable points specified by the manual. Keep the bars straight and the rider in the normal riding position.
Front measurements can be complicated by top-out springs and fork design. If the number seems implausible, check the model-specific manual or ask a suspension specialist rather than forcing a generic target.
Useful Sag Starting Points
| Use | Rider sag starting point | What matters in practice |
|---|---|---|
| General road riding | About 25–33% of total travel; often around 30–40 mm on road bikes | Enough extension travel for dips, enough compression travel for potholes and braking |
| Sporty road riding | Near the firmer/lower-sag end of the road range | Support and steering precision without making bumpy roads miserable |
| Track day | Often about 20–25% of travel; roughly 25–30 mm on many sport bikes | Use the bike, tyre, and suspension maker’s data when available |
| Adventure or off-road | Often around 30–35% of travel, especially at the rear | Long-travel forks and top-out springs make model-specific guidance important |
| Touring, luggage, or passenger | Restore the loaded bike close to its solo target | Add preload for the extra load; don’t simply accept the tail sitting much lower |
These are starting points and are not set in stone. Sport Rider’s suspension setup guide gives the familiar 30 mm street and 25 mm track baselines, while longer-travel and top-out-spring designs can require different numbers. Your manual and the behaviour of the bike take priority.
What Free Sag Tells You About Spring Rate
Once rider sag is right, look at free sag. If you needed lots of preload to achieve rider sag and the bike has almost no free sag, the spring is probably too soft for the load. If rider sag is correct but free sag is excessive with very little preload, the spring may be too stiff.
That’s the point where you stop winding collars and choose the right spring. The most useful spring is the one matched to rider, motorcycle, typical load, and use. Whether a spring is linear or progressive comes after that fundamental question.
Step 2: Set Rebound Damping
Rebound damping controls how quickly the suspension extends after compression. Too little and the bike can bounce, wallow, or feel loose after a bump. Too much and the wheel returns too slowly. Over repeated bumps the suspension can remain lower after each hit, a condition called packing down.
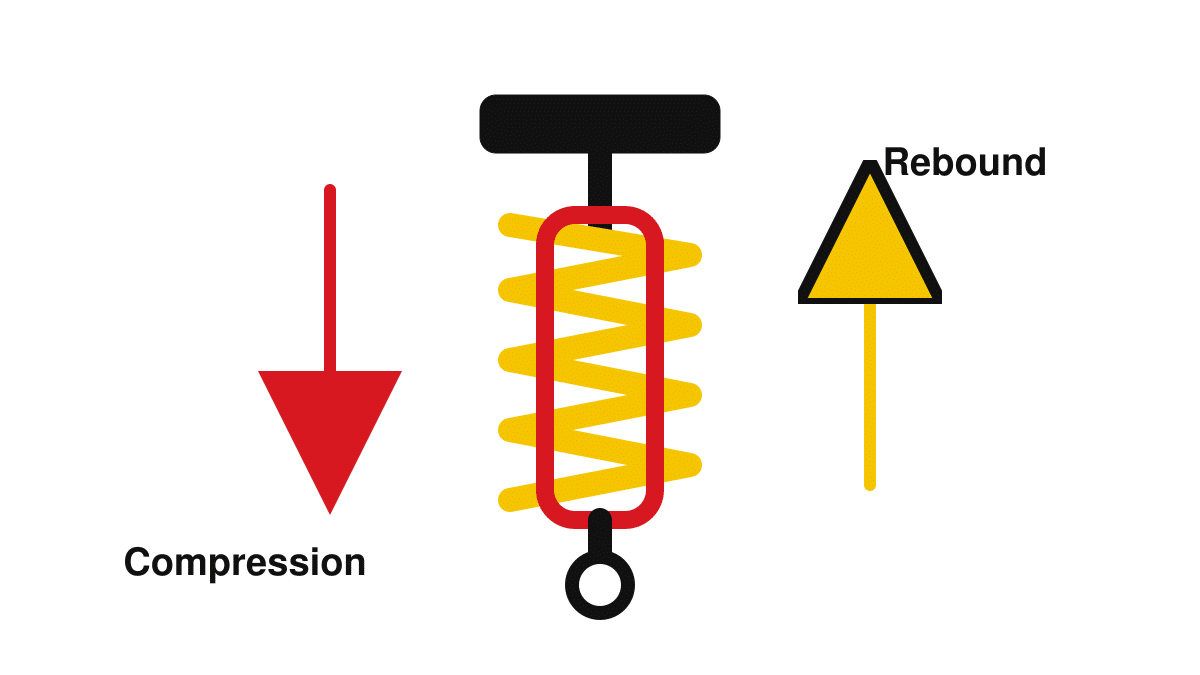
A garage bounce test helps spot an extreme setting. Press firmly on the front or rear and release. The suspension should return promptly and settle, rather than springing past its resting point and oscillating. But the real test happens while riding because tyre forces, temperature, bump shape, and chassis pitch can’t be reproduced by leaning on the seat.
- Start at the standard setting with sag already set.
- Ride the same short route at a comfortable, repeatable pace. Include a smooth corner, a bumpy corner, braking, acceleration, and a series of small bumps.
- Change one end by two clicks, or about an eighth-turn if there are no clicks.
- Ride again. If the bike improves, continue in the same direction in smaller steps. If it worsens, return to the last good setting.
| What you feel | Possible cause | Test adjustment |
|---|---|---|
| Bounces or continues moving after a bump | Too little rebound damping | Add rebound damping |
| Harsh over closely spaced bumps; rides lower through the sequence | Too much rebound damping, causing packing | Reduce rebound damping |
| Rear feels loose or wallows on corner exit | Often too little rear rebound, assuming spring and sag are right | Add rear rebound in small steps |
| Rear skips or loses grip over repeated bumps | Often too much rear rebound | Reduce rear rebound |
| Front feels vague as the brake is released and the fork rises | Front rebound may be too fast | Add a small amount of front rebound |
| Front stays low and steers heavily after bumps or braking | Front rebound may be too slow | Reduce front rebound |
Every symptom has other possible causes. A squared tyre, wrong spring rate, poor riding position, or too-tight chain can impersonate a damping problem rather convincingly. Use the table above as a test plan.
Step 3: Set Compression Damping
Compression damping controls the rate at which a fork or shock compresses. More damping can add support under braking, acceleration, and smooth chassis loads. Too much makes the wheel reluctant to move over bumps, which can feel harsh while reducing grip. Too little can let the bike dive, squat, wallow, or rush through its travel.
“High-speed” and “low-speed” compression refer to suspension-shaft speed, not the speed at which you’re going. A sharp pothole at 30 km/h can be a high-speed suspension event. A smooth braking load at 150 km/h can be a low-speed event.
| What you feel | Possible cause | Test adjustment |
|---|---|---|
| Sharp bumps feel wooden; tyre skips across rough surfaces | Too much compression damping | Reduce compression damping |
| Excessive fork dive, shock squat, or wallow through smooth corners | Too little low-speed compression, too much sag, or spring too soft | Check sag first, then add low-speed compression |
| Uses nearly all travel during ordinary riding | Too little support or a spring-rate problem | Check sag and spring rate before adding lots of damping |
| Bottoms only on isolated square-edged hits | Insufficient high-speed support, limited travel, or simply a severe impact | Use high-speed adjustment only if provided; otherwise seek specialist advice |
Use a Zip Tie to Check Fork Travel
On a suitable exposed fork leg, place a small zip tie around the clean stanchion and slide it gently against the dust seal. After riding, its position shows the maximum fork travel used. Clean the leg first and don’t leave the tie rubbing where it can collect grit or damage a seal.
You normally want to use most (not all) of the available travel during the hardest event in that ride. Don’t assume the visible stanchion length equals usable travel; bottoming can occur before the dust seal reaches the casting. Check the manual or a suspension specialist before declaring victory based on a remaining 10 mm.
Step 4: Check Front-to-Rear Balance
A bike feels coherent when the front and rear respond as a pair. Fork angle, linkage ratio, weight distribution, suspension travel, and braking forces are different. The goal is predictable chassis attitude.
With the bike upright, push down near the centre and watch both ends. A gross mismatch is obvious: one end may drop quickly while the other barely moves. Use this as a rough check, then fix it, and confirm it on the road. Pay attention to transitions into braking, through corner entry, over mid-corner bumps, and onto the throttle.
How to Set Up Suspension for Different Uses
Everyday Road Riding
For the road, it’s not about comfort, but rather maximising usable grip and composure across imperfect surfaces (potholes, creases, tram tracks, etc.). Set road-appropriate sag, begin at standard damping, and use the roughest surfaces you regularly encounter as part of the test. A setting that feels impressively firm on a smooth road may be slower and less secure on the road you actually ride.
A good road setup lets the wheels move without making the chassis float. If you have to choose between an extra degree of racetrack precision and keeping the tyre attached to a broken back road, choose the latter.
Sporty Road Riding
A sporty road setup often uses slightly less sag and a little more low-speed damping than a comfort-focused setup, but only after the spring rate is suitable. Keep enough compliance for bumps while leaned over. Make changes in small steps and test corner-entry support separately from bump absorption.
Touring, Luggage, and a Passenger
Extra load belongs mainly over the rear, so rear preload is the first adjustment. Load the panniers, top box, rider, passenger, and normal gear, then measure rider sag again. Add preload until the rear returns close to its solo ride height and sag target.
The extra mass stores more energy in the spring, so some bikes also benefit from additional rebound damping. Add only what is needed to stop the rear returning too quickly. If the loaded bike still has excessive sag at maximum preload, or almost no free sag once rider sag is restored, the spring is too soft for that load.
Save the solo and loaded settings. A hydraulic preload knob or electronic load setting exists precisely so you don’t have to leave the bike in two-up mode forever. Also check the manual’s loaded tyre pressures and maximum payload, including accessories and luggage racks.
Track Days
At the track, begin with known-good road or manufacturer track settings, fresh tyres at pressures recommended by the tyre supplier for track use, and plenty of time. Don’t arrive with every adjuster wound hard because “race bike”.
- Set sag and confirm the spring rates before chasing damping.
- Use the same circuit, pace, and reference corners while testing.
- Make one change per session and note lap conditions.
- Use a fork zip tie and inspect tyres, but don’t treat tyre wear as a single-variable suspension oracle.
- Prioritise confidence, grip, and repeatability over a theoretically ideal click count.
As your pace rises, brake force, corner load, temperature, and aerodynamic load all change. A setup can work at one pace and feel wrong at another. If you’re new to the track, spend money on coaching and a baseline setup before buying shiny suspension parts.
Rough Roads, Gravel, and Adventure Riding
Rough surfaces reward compliance and recovery. More rider sag is common on long-travel motorcycles, and lighter damping may help the wheels follow rocks, corrugations, and potholes. Too much rebound is particularly unpleasant over repeated hits because the suspension packs down into a harsh, low part of its travel.
Don’t blindly copy an enduro setting onto a large adventure bike used mostly on sealed roads. The mass, load, tyres, travel, speeds, and available adjustments differ. Build a road baseline and an off-road baseline, then record both.
Commuting and Poor Urban Roads
If potholes and expansion joints dominate your ride, chase controlled compliance rather than stiffness. Confirm that the springs aren’t holding the suspension near the top of its travel, reduce excessive compression damping, and make sure rebound is quick enough to recover between successive hits.
What About Electronic and Semi-Active Suspension?
This may seem like a whole other ball game, but electronic suspension still uses springs and damping. The difference is that motors or proportional valves change settings for you.
A simple electronic system might just let you change preload from the handlebars, and a slightly more advanced one might give fixed damping modes. A semi-active system changes damping continuously using sensor data, while still letting you choose a broad mode or bias.
So the quick version is think of electronic suspension the same way you think about suspension generally — the same stuff is inside.
- Choose the correct load setting for solo, luggage, or passenger use unless the bike measures and sets preload automatically.
- Start with the standard Road, Normal, or Auto mode.
- Move to Comfort for rough roads or Sport/Track for more chassis support, then assess the same symptoms used with manual suspension.
- Remember that an electronic damping valve can’t rescue the wrong spring rate, worn oil, or a leaking seal.
Names are inconsistent. One maker’s “Dynamic” may be another maker’s “Sport”, and some modes change throttle response, traction control, or engine braking as well as suspension. Read the manual before deciding what the button did.
Geometry: Rake, Trail, and Ride Height
Suspension setup changes chassis attitude. More rear ride height or less front ride height generally steepens the steering geometry and reduces trail, making the bike turn more readily but potentially reducing stability. The opposite generally slows steering and adds stability.
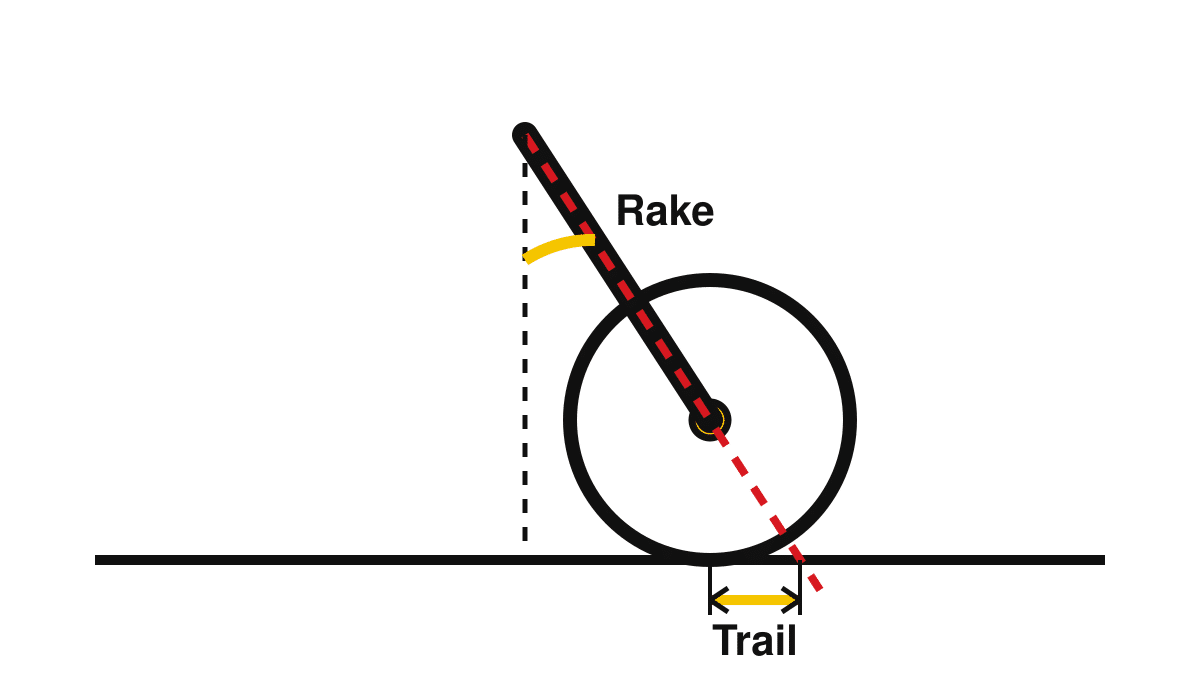
Rake is the angle of the steering axis from vertical. Trail is the ground distance between where that steering axis would meet the ground and the centre of the tyre’s contact patch. They contribute to steering feel and self-stability, but they aren’t the only influences.
Set springs, sag, and damping before changing fork height or shock length. Moving fork tubes in the clamps, changing rear ride height, or fitting lowering links can affect ground clearance, chain geometry, sidestand lean, wheel clearance, steering stability, and electronic calibration. Use model-specific limits and make very small changes.
A steering damper can calm rapid steering movement, but it isn’t a substitute for correct chassis setup. And yes, it is a steering damper, not a steering dampener. I have grudgingly accepted that hill.
A Practical Suspension Troubleshooting Table
| Symptom | Check first | Then test |
|---|---|---|
| Harsh over small, sharp bumps | Tyre pressure, stiction, service condition | Less compression; possibly less rebound if it packs |
| Bottoms under braking | Front sag, spring rate, actual travel used | More low-speed compression in small steps |
| Rear squats excessively on acceleration | Rear sag and spring rate | More low-speed compression |
| Bounces after a bump | Tyres and spring suitability | More rebound |
| Gets harsher through repeated bumps | Whether the bike is packing down | Less rebound |
| Runs wide or steers slowly | Tyres, front/rear sag, rear ride height | Restore balance before changing geometry |
| Falls into corners or feels nervous | Tyre profile and pressure, front sag, ride height | Restore the baseline; avoid chasing it with damping |
| Wallowing in long corners | Tyres, bearings, spring rate, sag | Add damping one circuit at a time |
| Headshake | Tyres, wheel balance, bearings, alignment, sag, load position | Return geometry and damping to known settings; inspect professionally if severe |
When Adjustment Isn’t Enough
You need hardware, service, or expert help when the adjusters can’t put the motorcycle in a sensible range.
- Wrong spring rate: Rider sag and free sag can’t both be made reasonable, or the bike needs nearly all or none of its available preload.
- Worn damping: The bike still bounces, fades as it heats up, or shows little response to adjuster changes.
- Excessive stiction: Push-down and lift-up measurements differ substantially, or movement feels notchy.
- Insufficient adjustment range: The best setting is at or near fully open or closed.
- Changed use: A bike designed around solo road riding may need different springs and valving for regular two-up touring, racing, or loaded off-road travel.
Aftermarket parts aren’t automatically better. A standard shock with the right spring and fresh oil might be a better choice than an expensive unit ordered with the wrong spring. A good suspension technician asks about your weight in gear, luggage, passenger use, roads, pace, tyres, and priorities before choosing parts.
Keep a Setup Log
Suspension tuning becomes much easier when you stop asking your memory to compare today’s bumpy ride with a ride three Tuesdays ago. Record the following for a good baseline.
| Item | What to record |
|---|---|
| Load | Rider in gear, passenger, luggage, fuel level |
| Tyres | Model, condition, cold pressures |
| Sag | Front and rear rider sag; front and rear free sag |
| Preload | Lines, turns, clicks, collar position, or electronic load mode |
| Rebound | Front and rear clicks or turns out from closed |
| Compression | Front and rear; separate high- and low-speed settings if fitted |
| Geometry | Fork height, adjustable shock length, other non-standard parts |
| Conditions | Route or circuit, temperature, surface, pace |
| Result | One or two specific observations, not simply “better” |
The Öhlins suspension owner’s manual is a useful general reference for sag measurement and damping symptoms. RevZilla’s suspension vocabulary guide also gives a clear explanation of spring rate, preload, sag, and damping.
The Setup Order, One More Time
- Check tyres, pressures, bearings, alignment, chain slack, leaks, and service condition.
- Record the current settings and return to the manufacturer’s baseline if needed.
- Load the motorcycle as you’ll ride it.
- Measure rider sag and free sag, then set preload.
- Confirm that the spring rates are suitable.
- Tune rebound on a repeatable route.
- Tune compression and monitor travel.
- Check front-to-rear balance.
- Only then consider ride-height or geometry changes.
- Save separate road, touring, two-up, track, or off-road baselines.
You don’t need to become a suspension guru. You need a safe baseline, one clear problem at a time, and the discipline to stop when a change makes the motorcycle worse.
Done properly, suspension setup makes the bike calmer, more comfortable, and easier to trust. That’s good everywhere from a broken city street to the braking marker at the end of a straight.